
Once there was a company called Bits From Bytes that made revolutionary 3D Printers for FFF printing. Their printers evolved nicely, the BFB Touch beeing the best machine after a long line of printers.
Then BFB was bought by 3D Systems, and the BFB’s plan of “Democratizing 3D Printing” was comercialized by 3DS.
This page tries to explain how to modify the BFB Touch so that it prints reliably in great quality.
Problem 1: the printing bed
The original bed is made from a plastic-foam-plastic sandwich. The bed bends after every print and quickly gets destroyed. A new bed cost 60 Euros back then, and I am not even sure if they are still available.
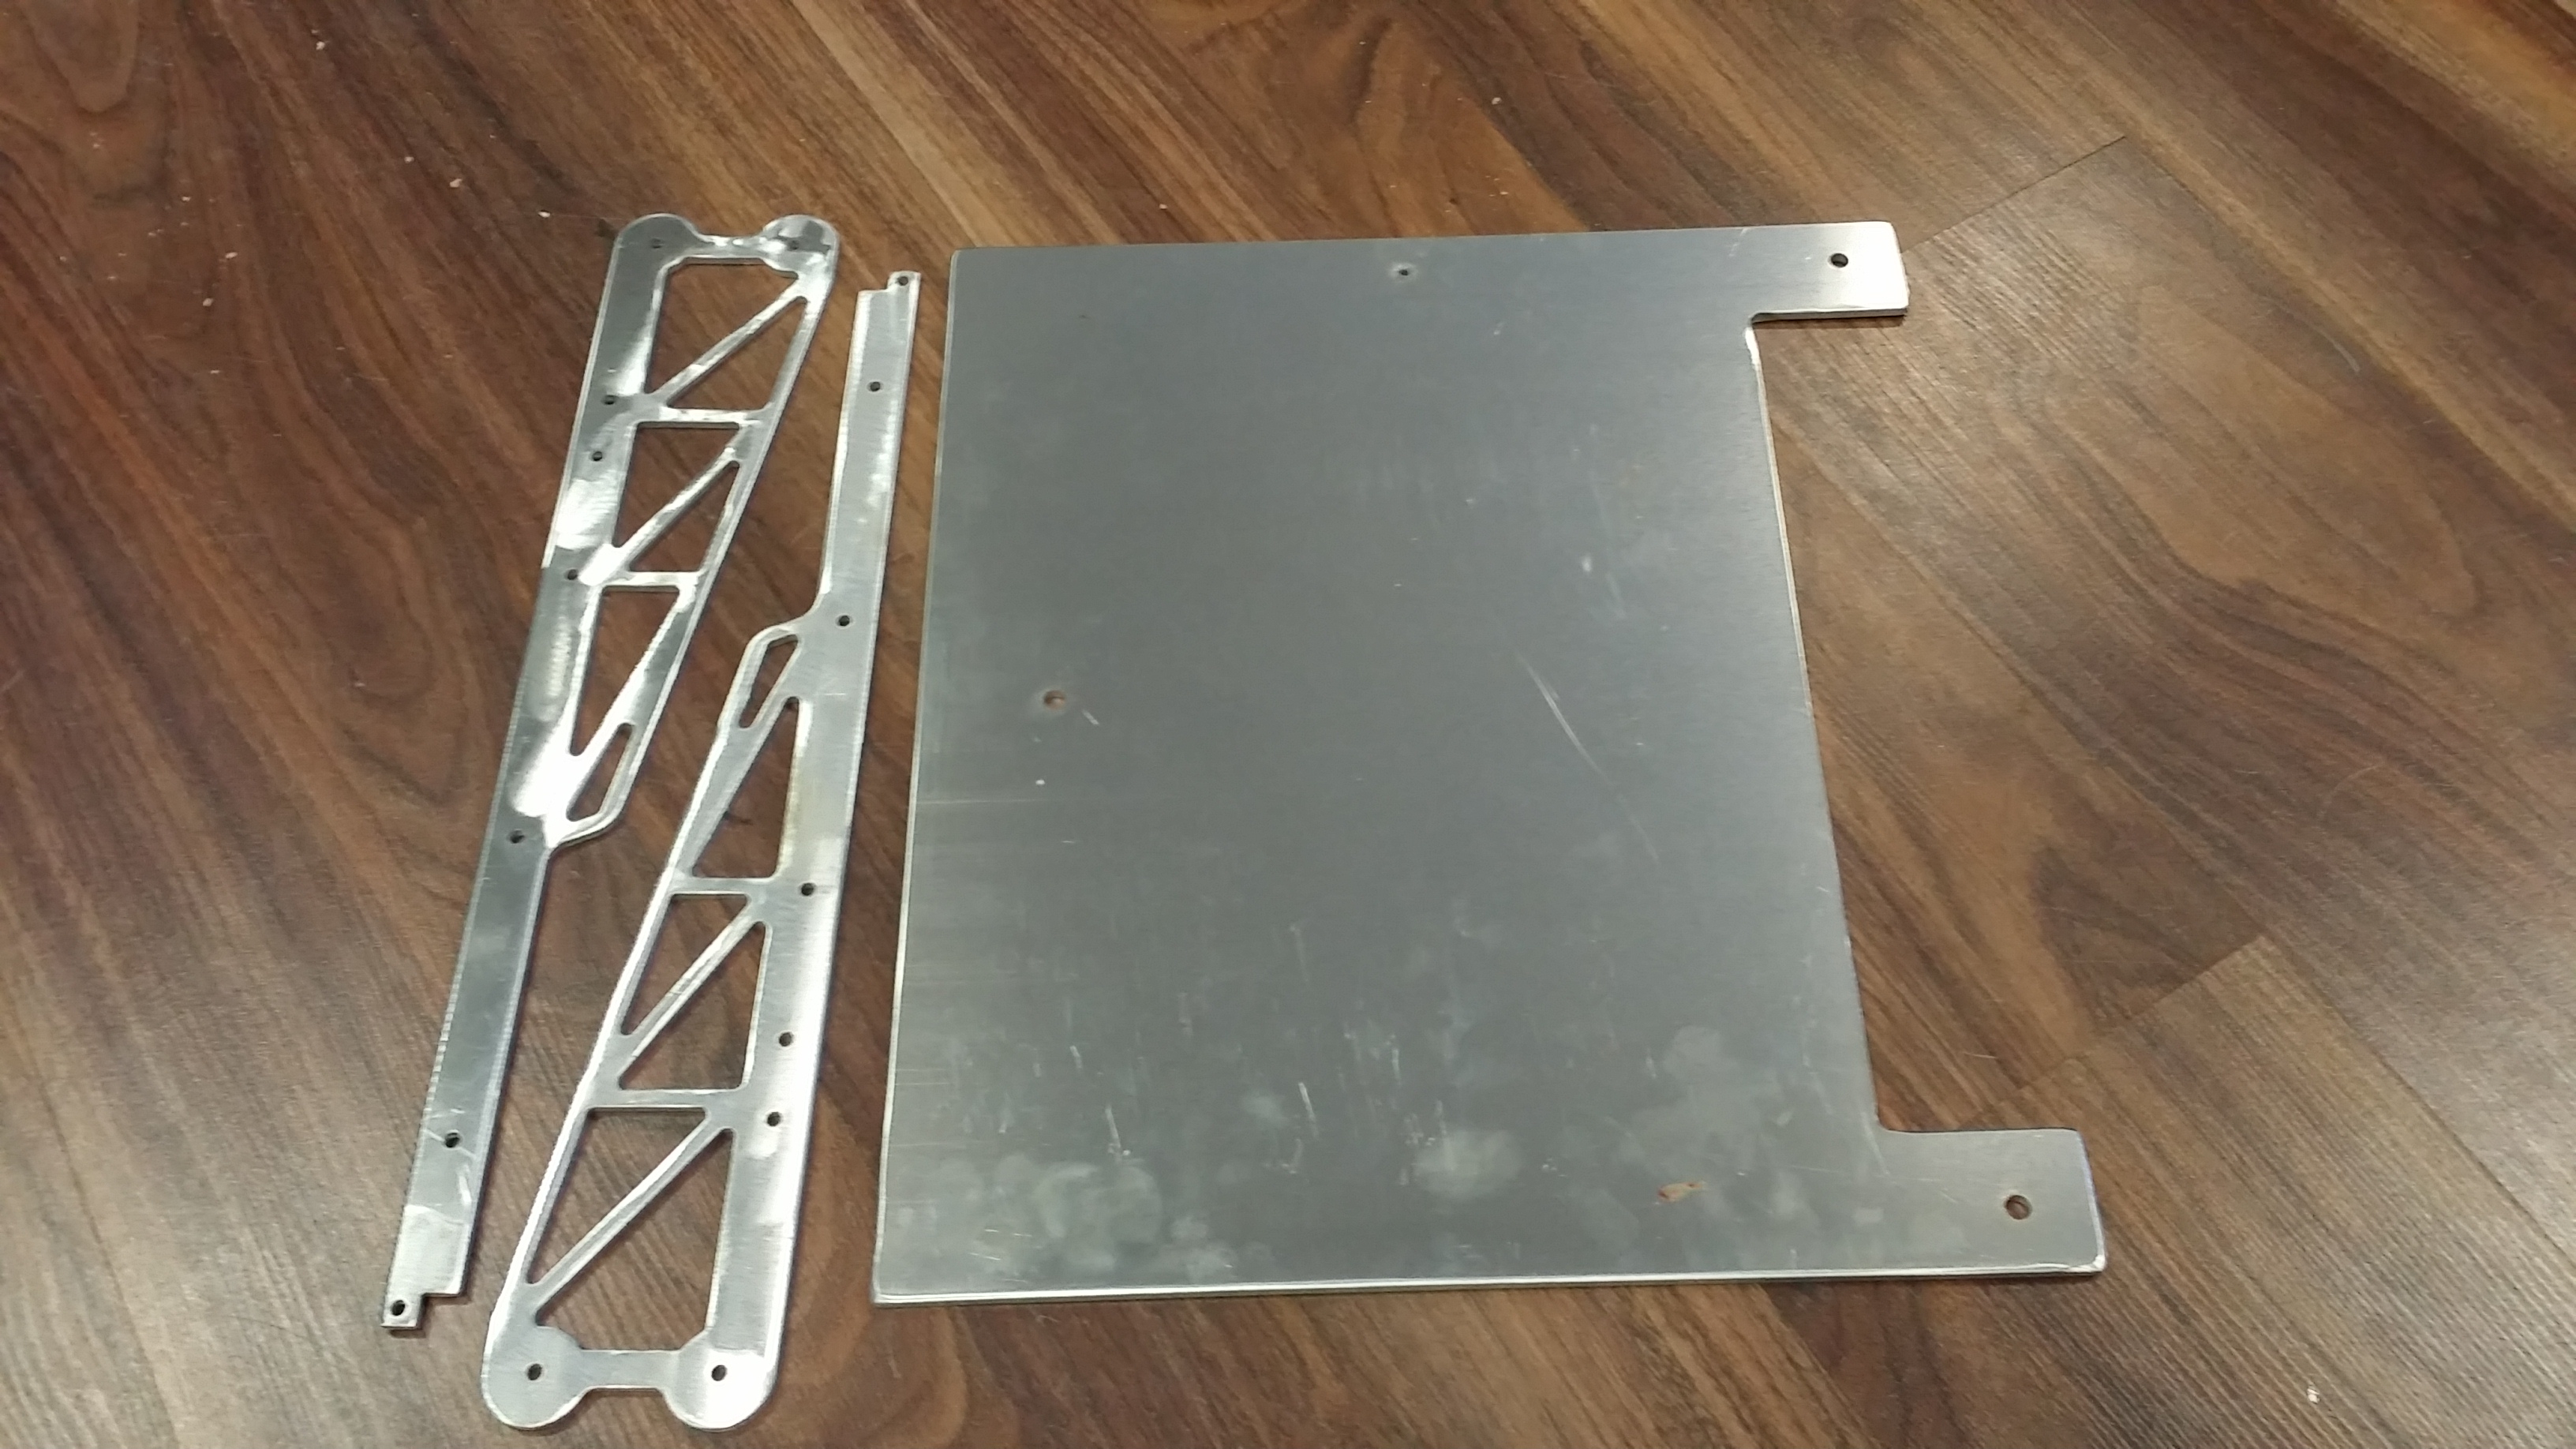
I ended up replacing the bed and the crossbars below the bed with lasercut aluminium parts. The dxf files were quickly created from the original parts. I sent the files to an online laser cutting service and received the aluminum parts for less than a replacement plastic board.
-
The Heated Bed

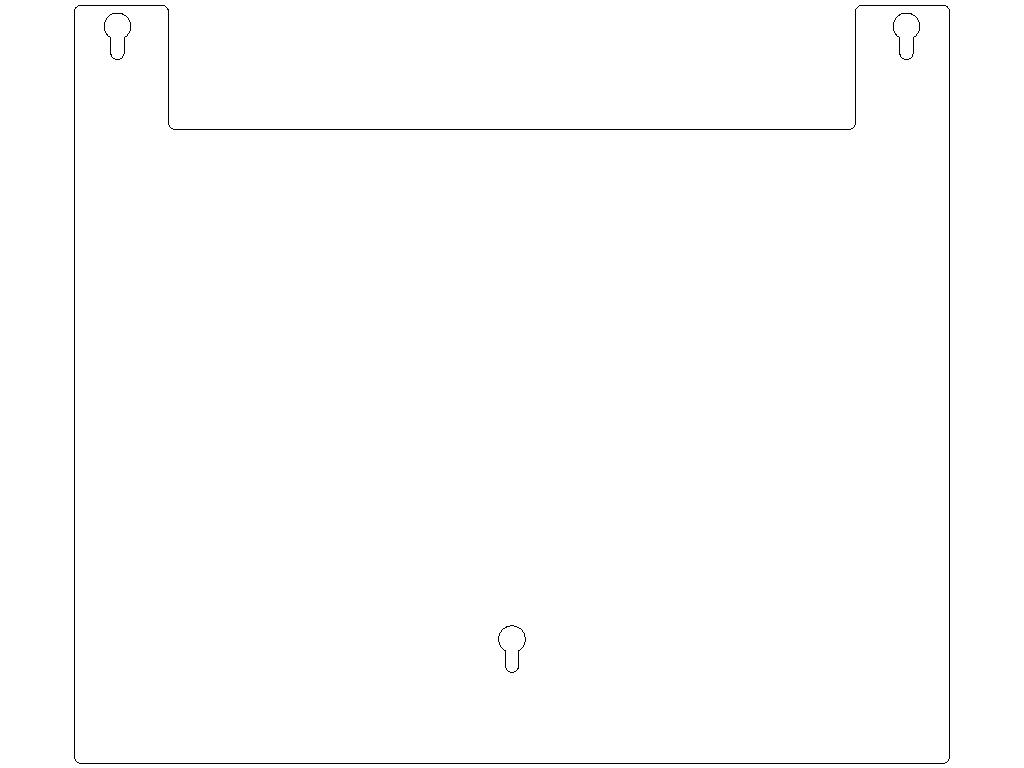
Using one of the online CNC shops, I had this cut out of 4mm aluminium. The heating pad is glued under the platform. It’s best to put a thin glass sheet on top of the plate. Neiter ABS nor PLA stick to aluminium. The plate will never bend and will not need replcement!There is a magnet in the middle of the plastic boards. The magnet triggers a reed contact, telling the Touch that Z height is correct. The magnet does not like heat! Move the magnet to the side and reposition the reed switch to make this work correctly. Even better, get an endstop switch and mount it somewhere convinient.
downloads/bfb_touch_platform_2.dxf
Oh, about the three spring-loaded bolts that hold the platform: turn them around to avoid crashing the extruders into them! Just drill out the threads in the cylinders and add two self-securing nuts.
-
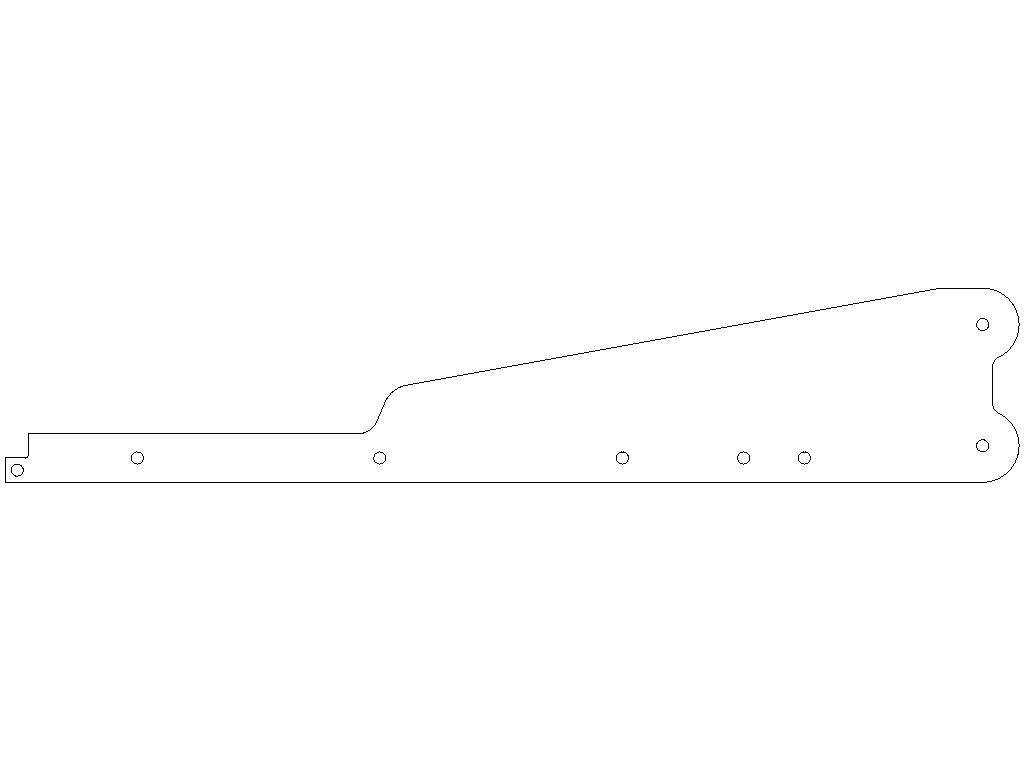
The Platform Struts
The build platform is held by four flimsy plastic bars. With a heavier build platform, these should be exchanged for sturdy aluminium bars. Her’s the DXF file:
Problem 2: build platform surface
Now the aluminum platform caused a new problem. While a new model sticks nicely – actually all too nicely – to the composite board, it does not stick to aluminium at all.
I solved the issue by taping the surface with Kaptan tape. It is sticky enough and heat resistant, which is important in the following steps. But before you go out and buy tape, read on. Glas seems to be the better solution.
Problem 3: warping
Printing quality in ABS (and PLA to a certain degree) relies heavily on room temperature. If the room is too cold or has a draft, the cooling ABS parts will shrink during the build, generating a warped object at best, or a total mess in the printer if the printhead jams into the warped object and rips it of the platform.
The solution is a bit involved, so I will separate this into the following sub-points.
Problem 3.1: a cold build platform
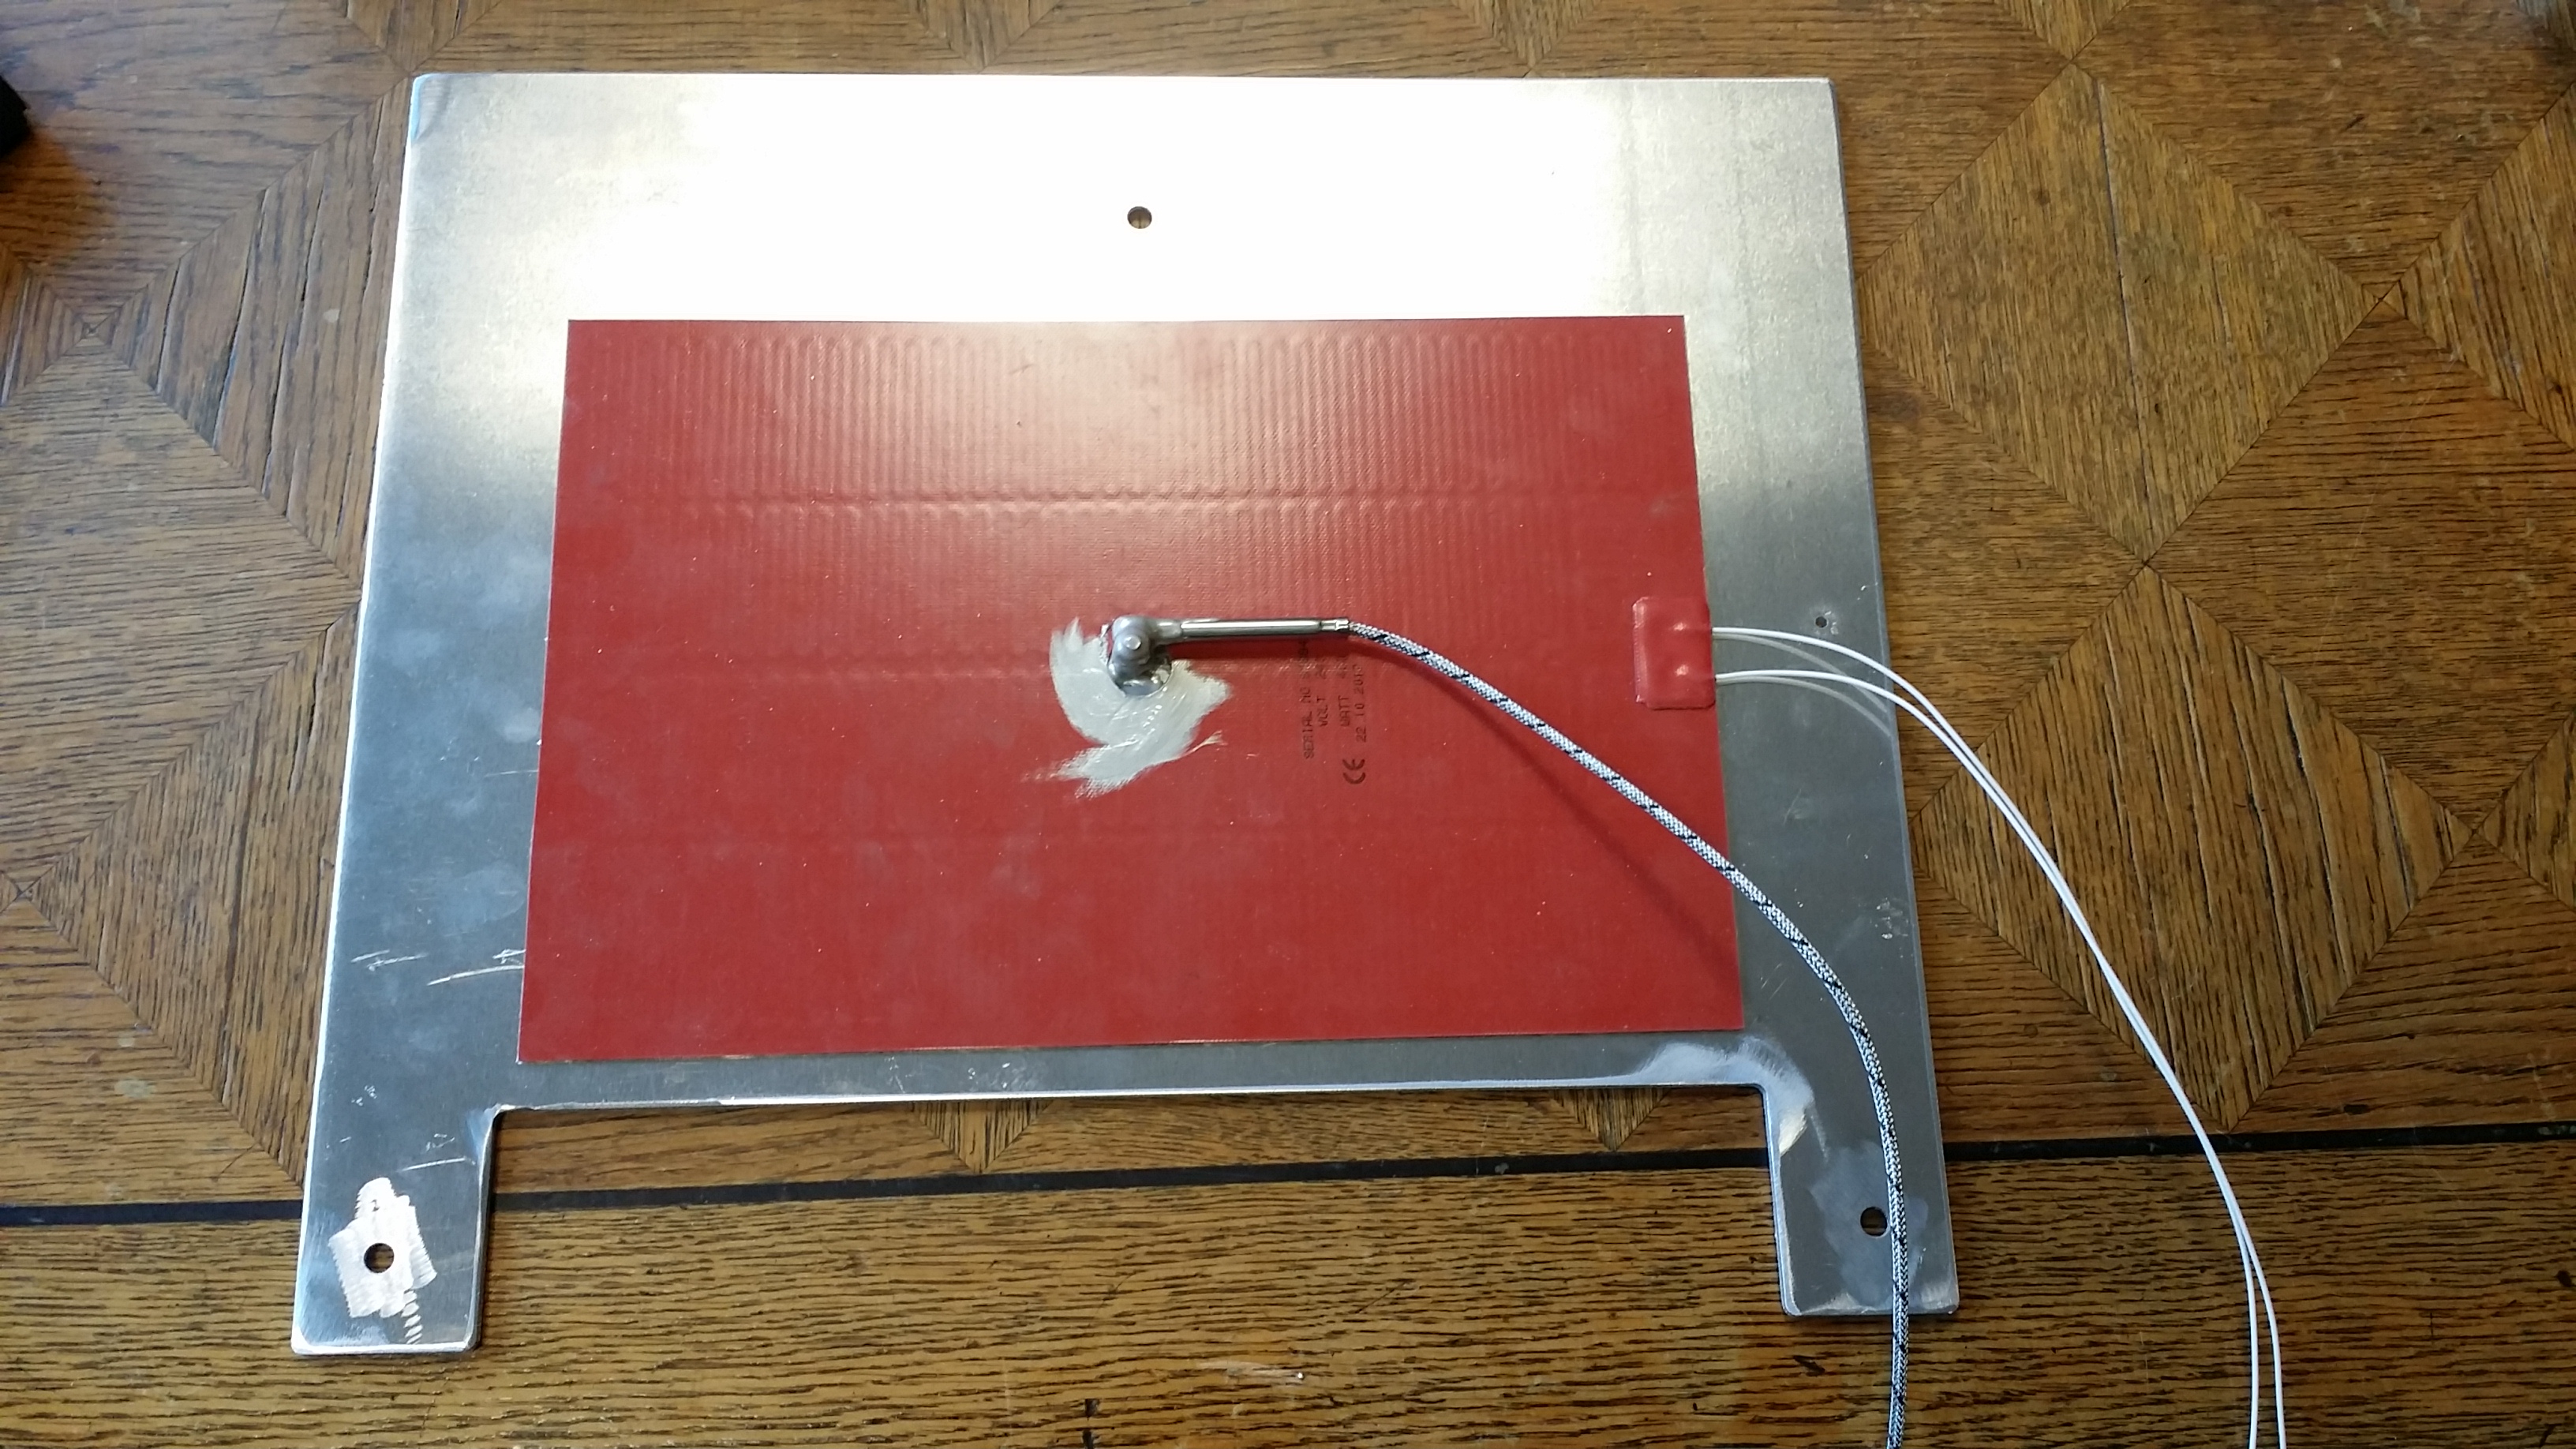
The build platform in the BFB Touch must be heated to reduce warping to a minimum and to improve object stickyness. Using the aluminum platform mentioned above, I stuck a 400 Watts silicone heating pad under plate. The silicone mat heats the platform to any temperature quickly and makes sure that the layers that are already printed do not contract and ruin the rest of the print.
Problem 3.2: drifting platform temperature
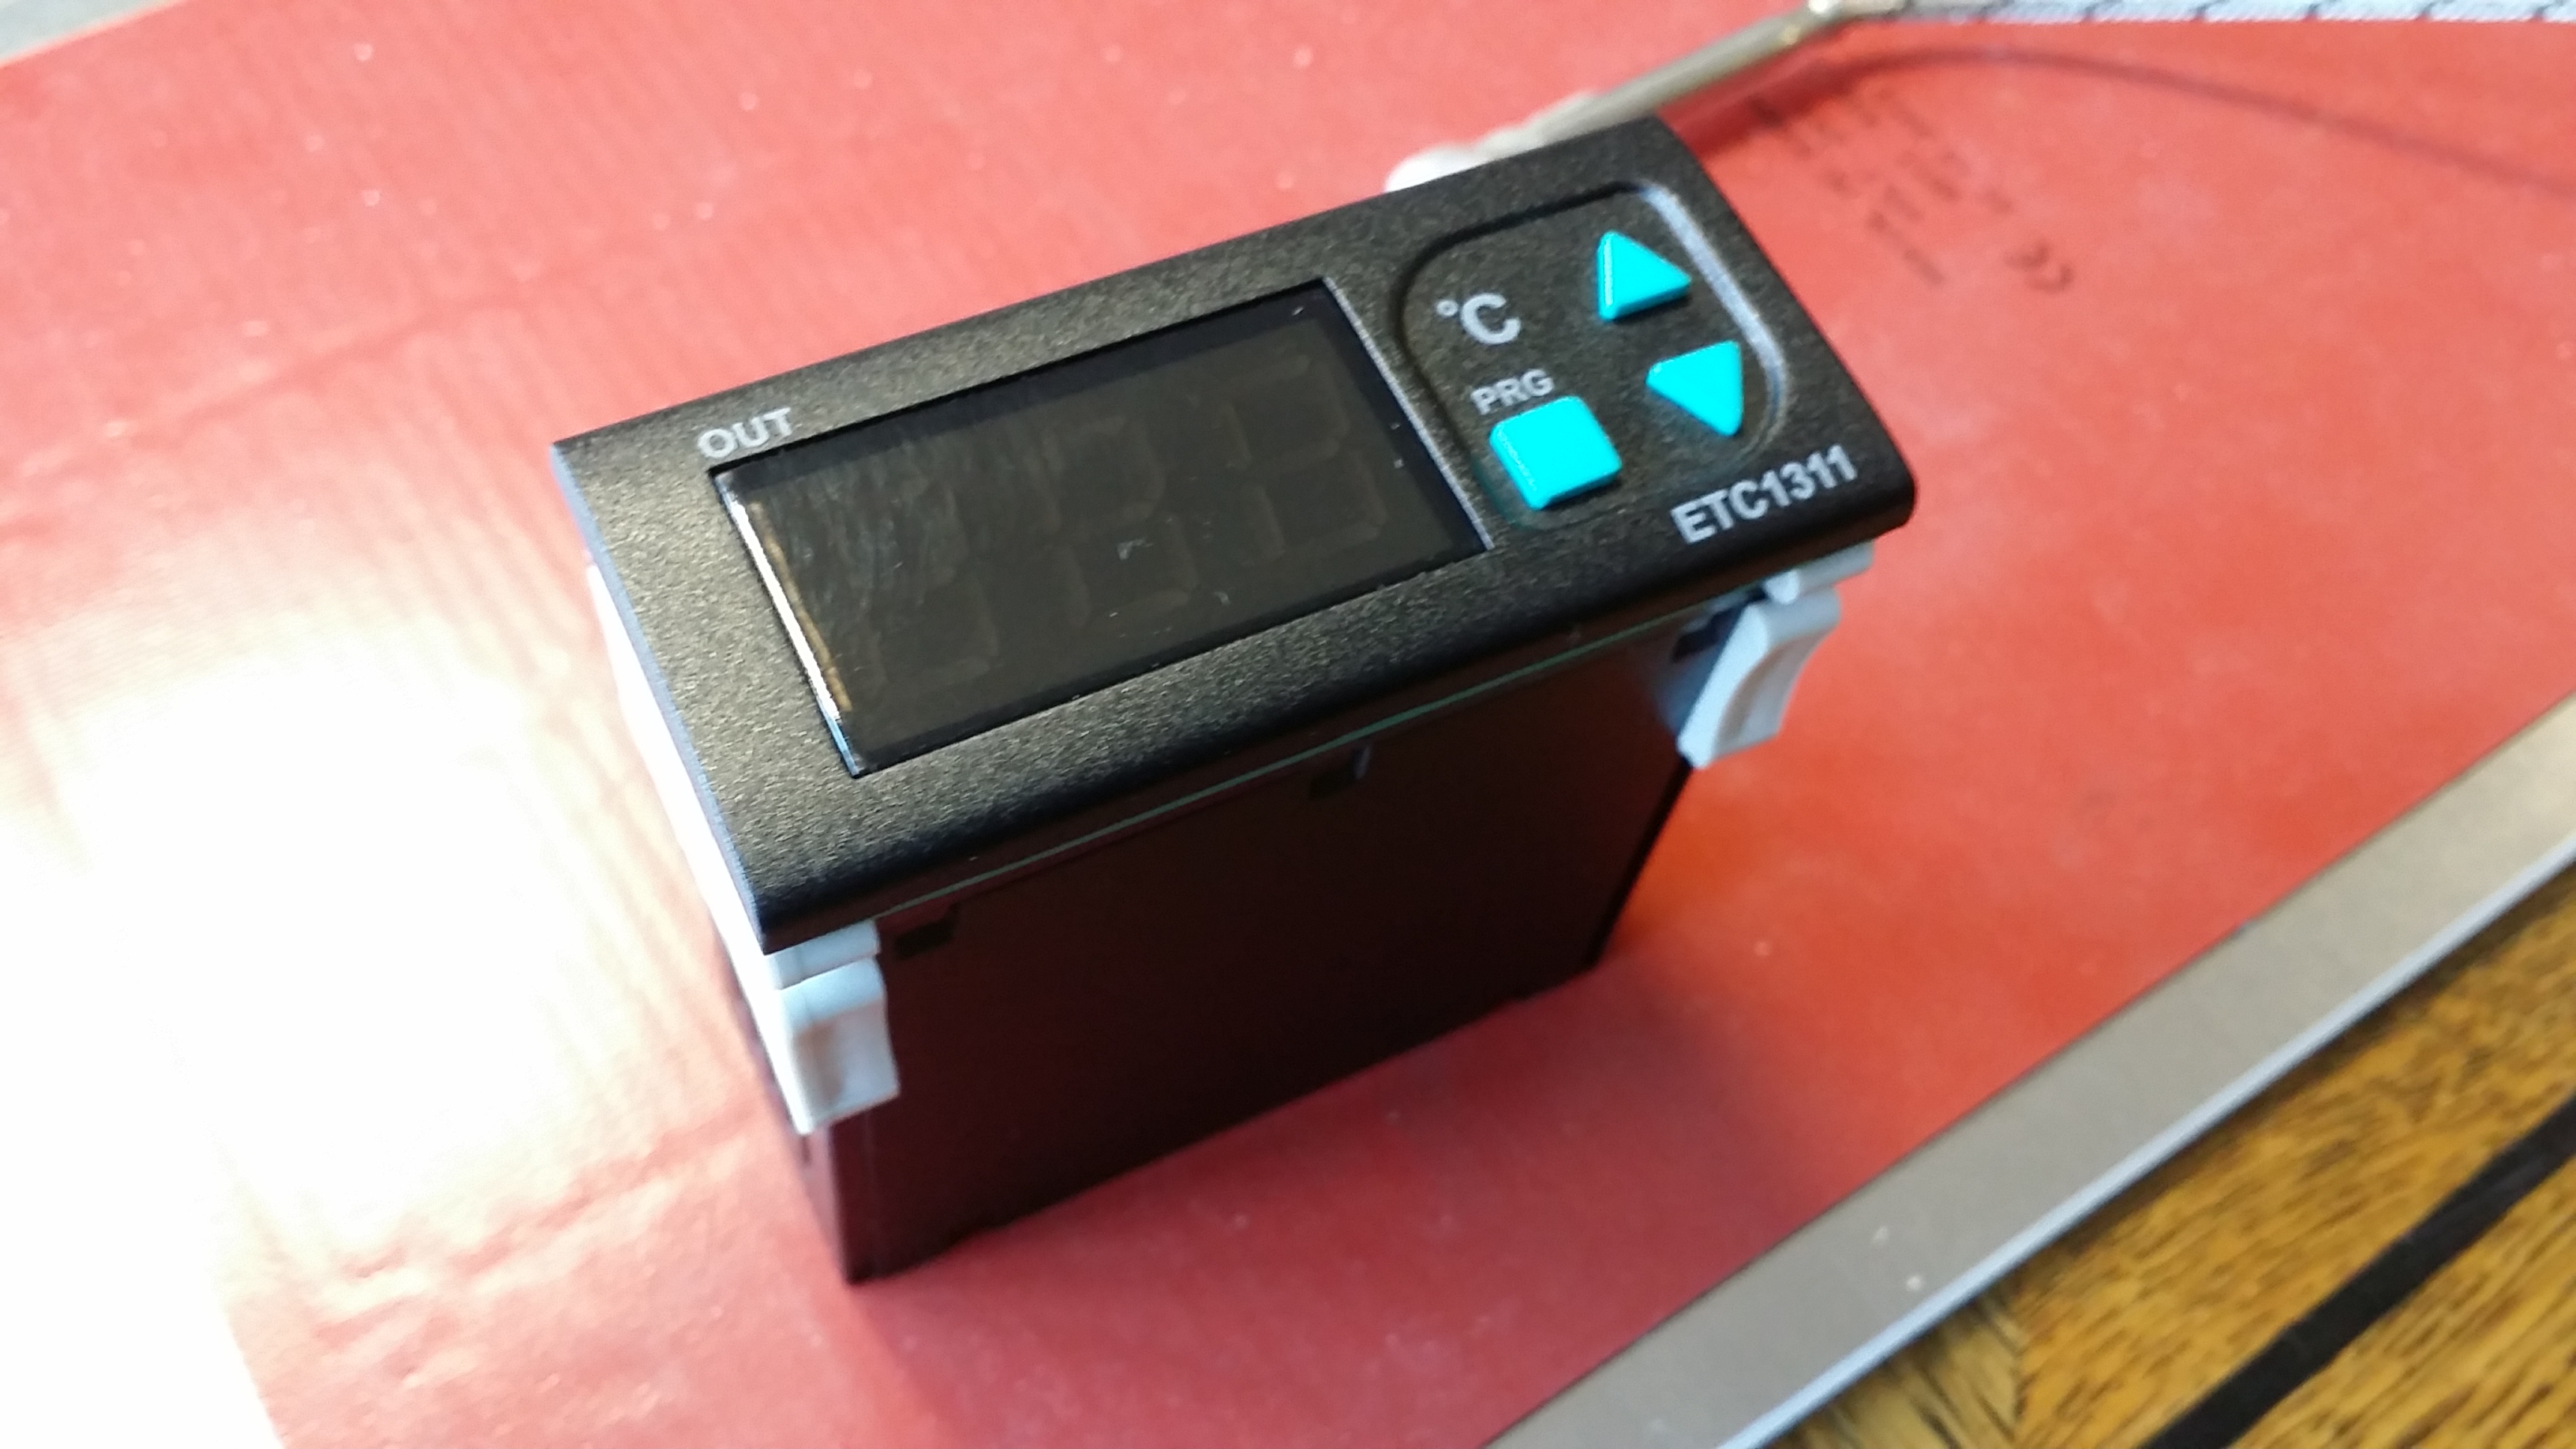
Well, now we have a heated build platform, but we must constantly measure the temperature and switch the heating off before it gets too hot. The solution is a temperature control module that runs on mains voltage and switches the heating mat on and off with a high-power relais.
The mat I ordered has a hole in the middle which is great for mounting the temperature feeler. The temperature module is relatively small and fits into the plexi outer shell.
Problem 3.3: drifting z position
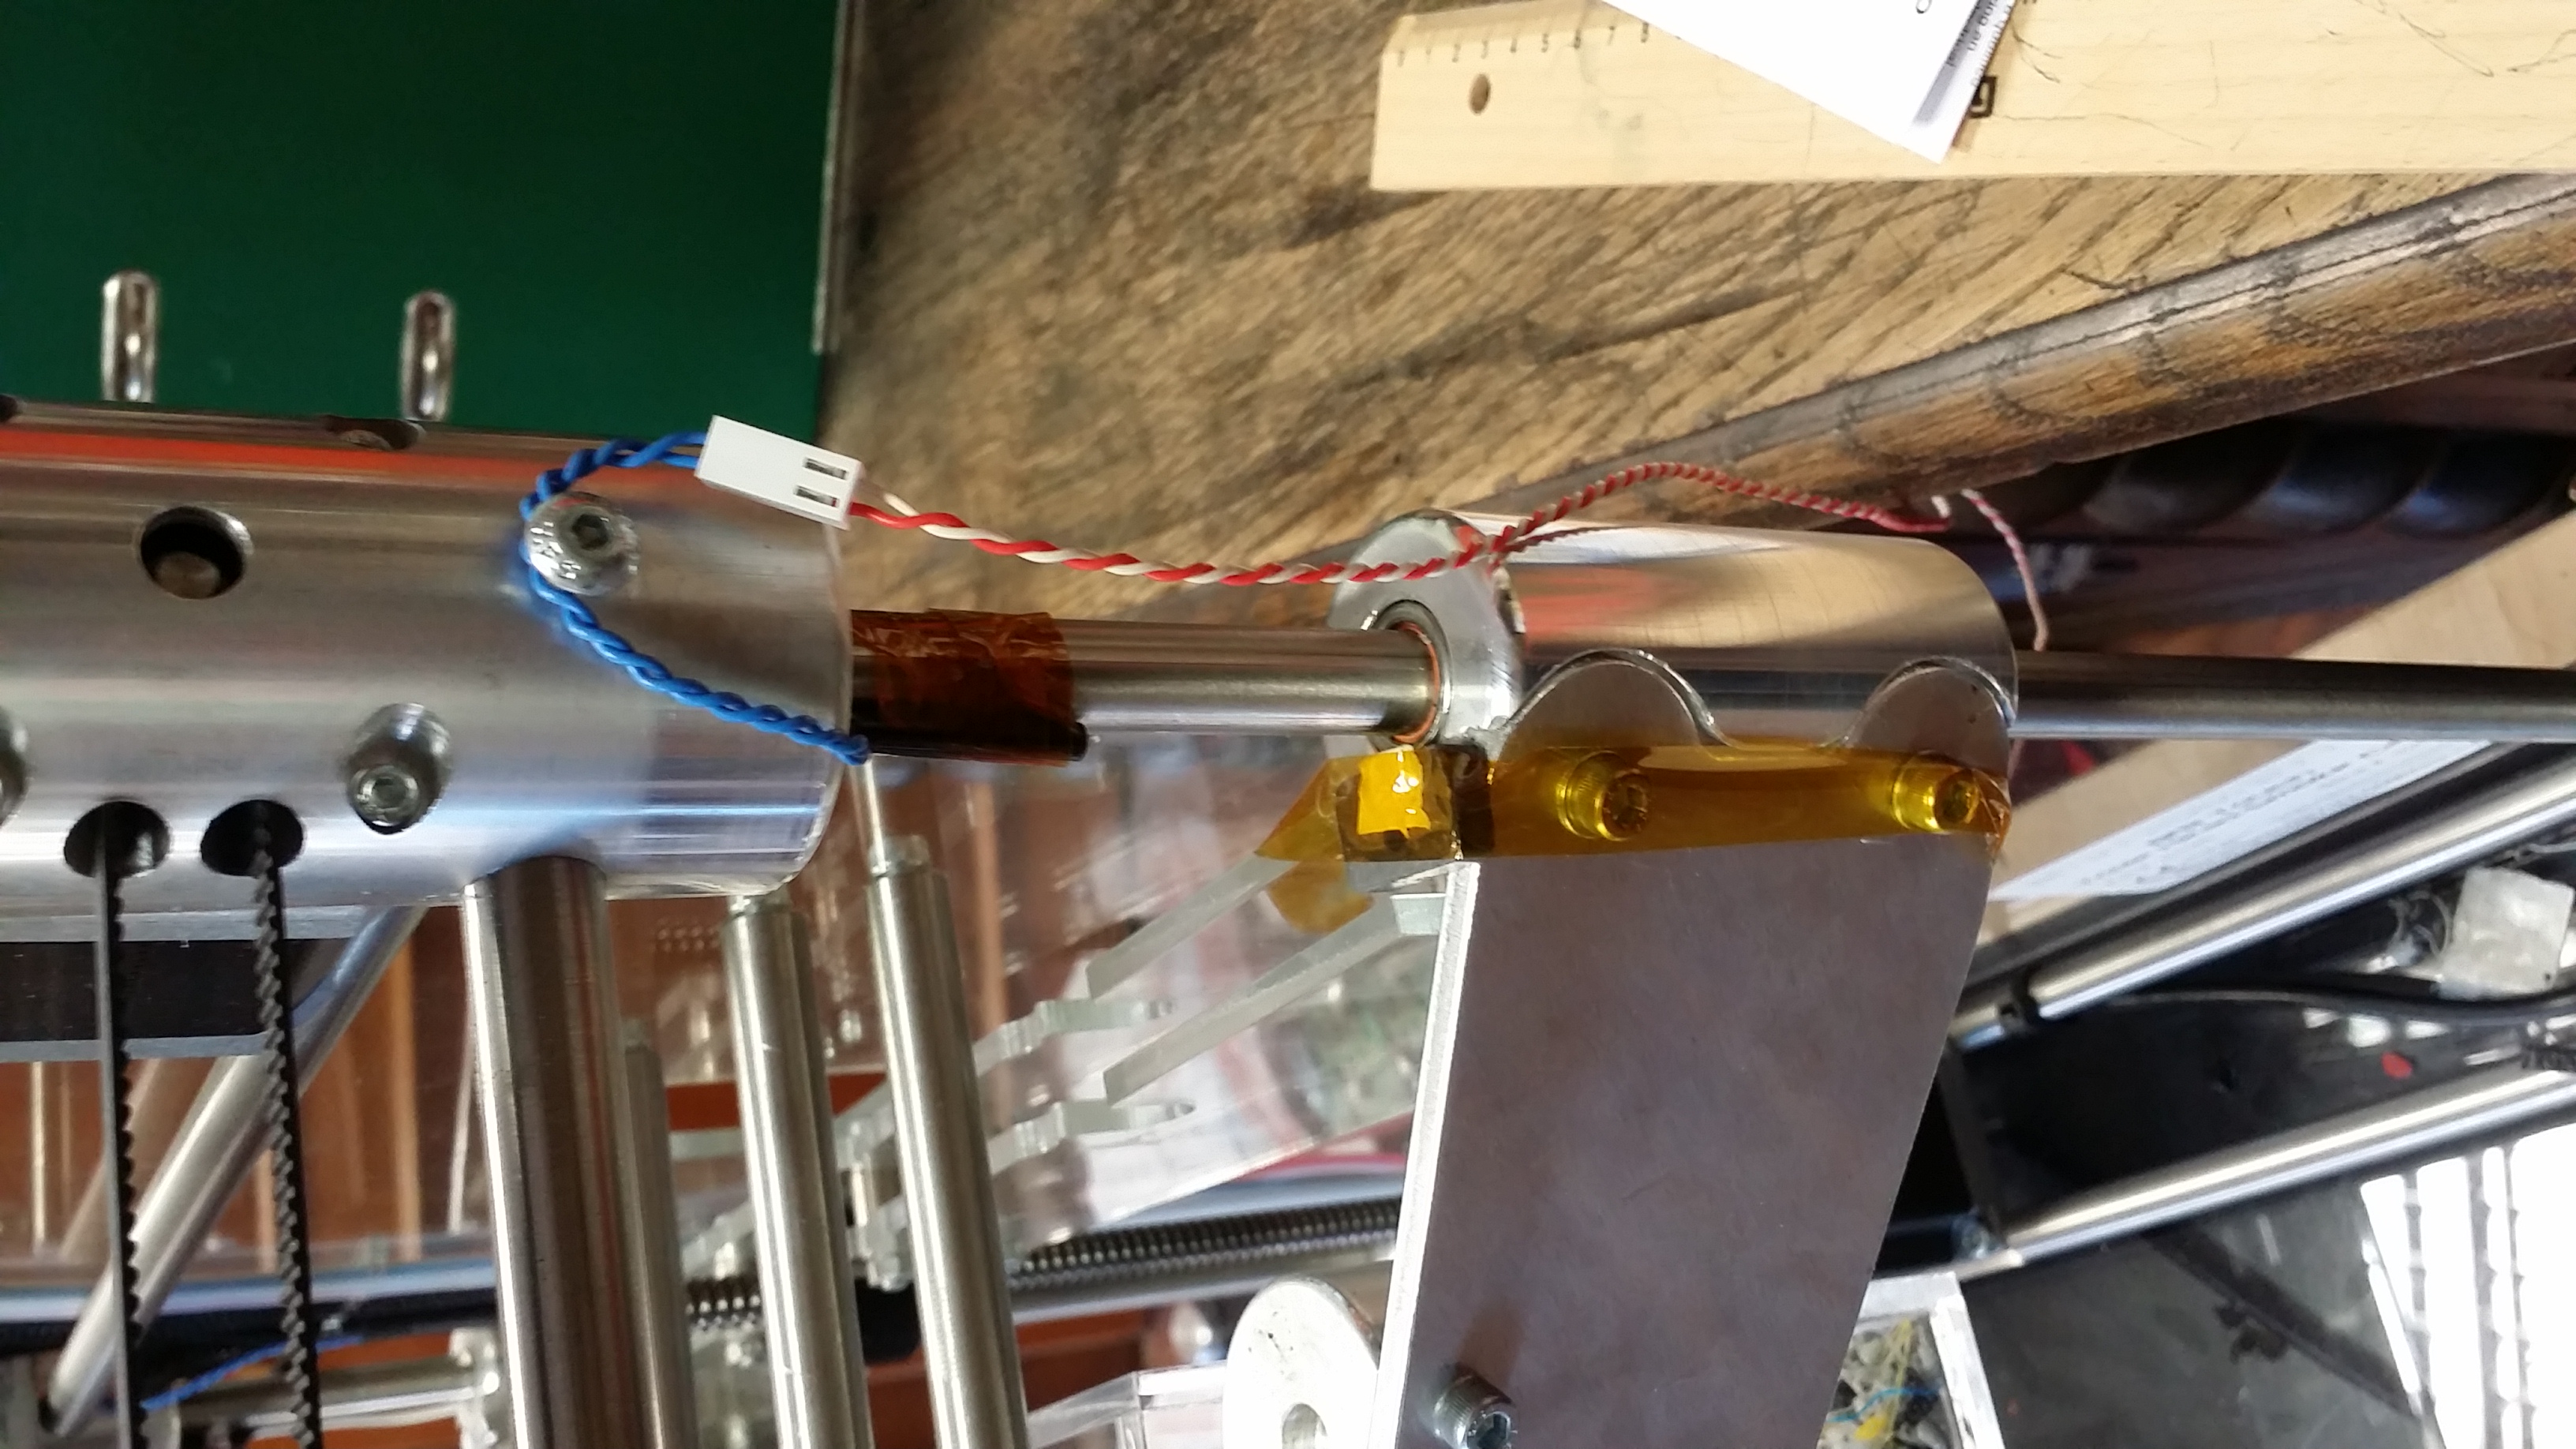
By solving this problem, we created yet another problem. The build platform contains a magnet that triggers the Z end stop switch. When the platform heats up, the magnet changes its field, causing the reed switch to react too late, messing up z calibration.
The solution is relatively straight forward: the reed switch is moved to the back right vertical column, and the magnet is glued on top of the z stage bearing. A new pair of wires must be routed from the main board. This would not work with the sandwitch board thanks to the warping of the build platform. For the aluminium platform, this is a great solution.
Problem 3.4: stickiness
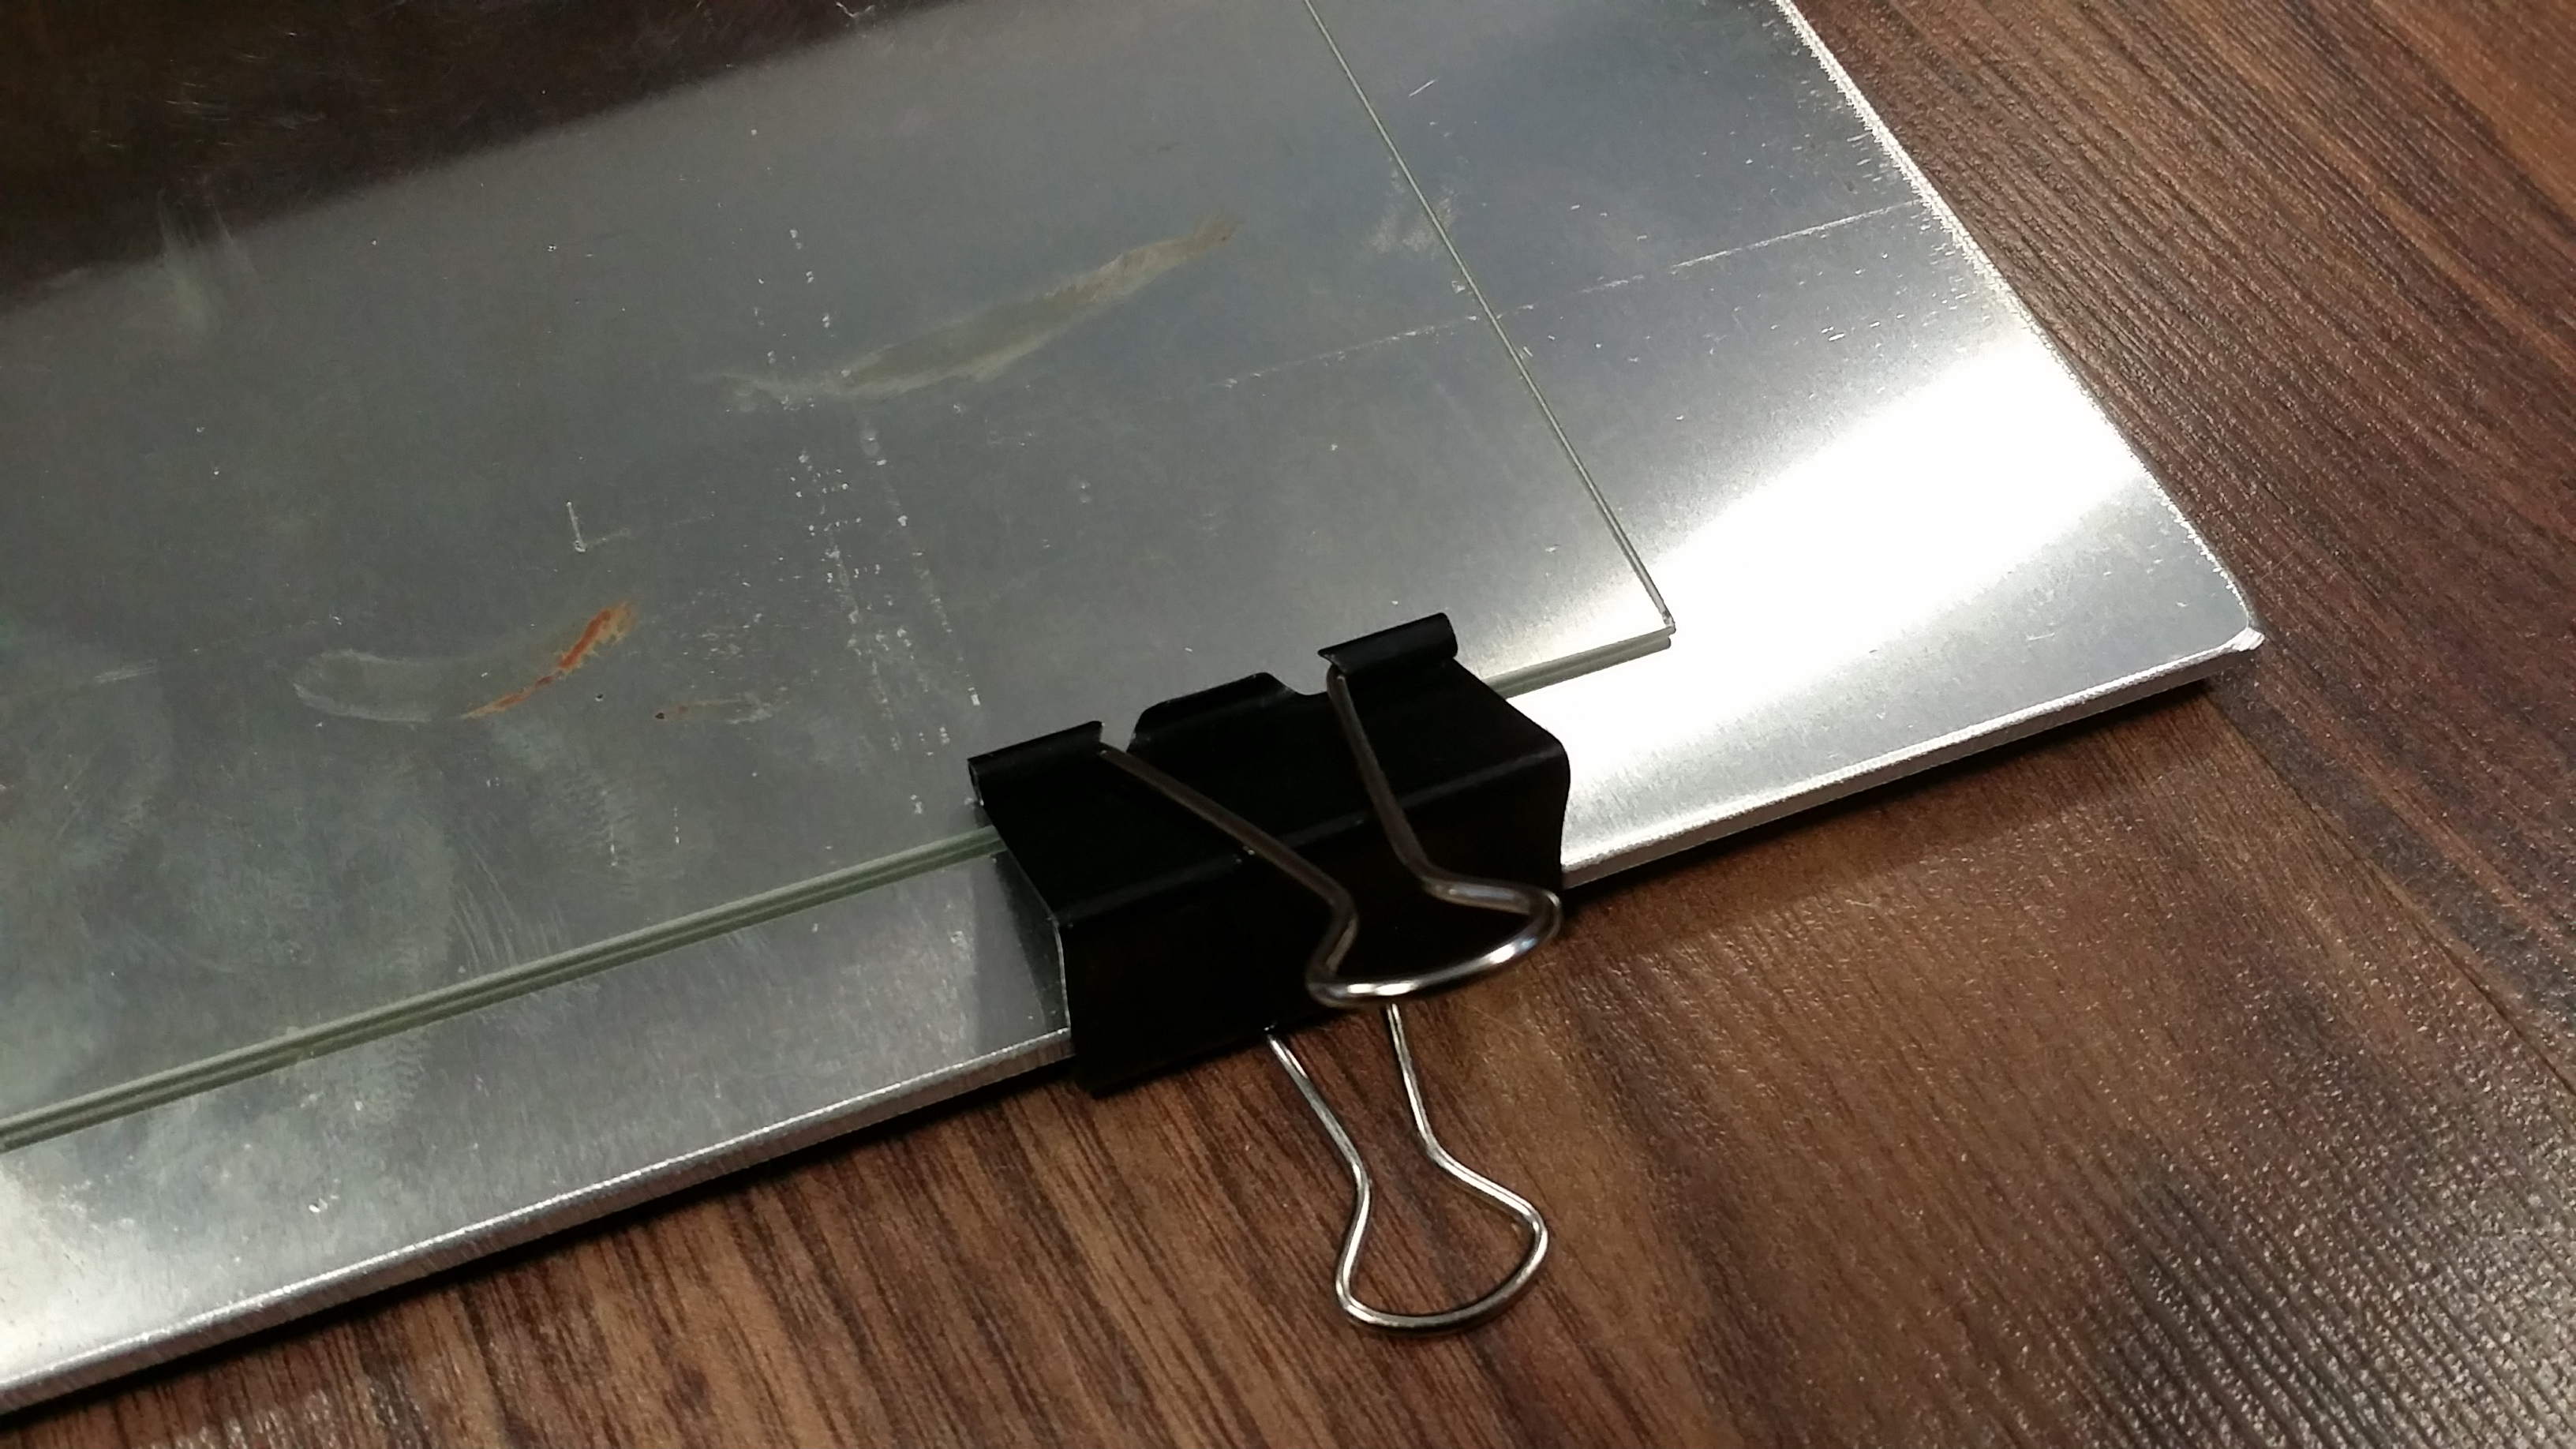
I used this setup with Kaptan tape and a Acetone/ABS slush as a glue. Although this works sufficiently, some of the tape needs to be reglued frequently. I am currently trying to use the glass from a picture frame. Glass is sufficiently sticky when hot. When cooling down, the ABS or PLA model simply snaps off, often just by itself due to the different shrinking rates.
Problem 3.5: spring loaded front mount
The Z calibration can be a bit off sometimes. In that case, the extruder can hit the platform, depressing the springs. Unfortunately, while the platform is springy, the bolts holding the platform are not, and the extruder head can ram into the bolt, ruining the print early on, or even ruining the extruder.
Again, the solution is painfully simple: drill the thread out of the front round piece. Then, mount the front bolt to the build platform and counter it with a disk and a self-securing nut. The spring and washer go in the same place as before. A second washer and self-securing nut the goes under the round mounting point.
Now that the bolt is connected with the platform instead of the Z crossbar, it has become spring loaded as well and your extruders are safe.
Problem 4: a cool breeze
I can’t stress enough how important a controlled temperature in the build area is. Why not use the heat from the build platform to also heat the build chamber? I cut three little doors from acryllic and mounted them with hinges and a little magnetic snapper. The breeze stays out and the build stays warm, avoiding pretty much all warping.
Problem 5: thunderbolts and lightning
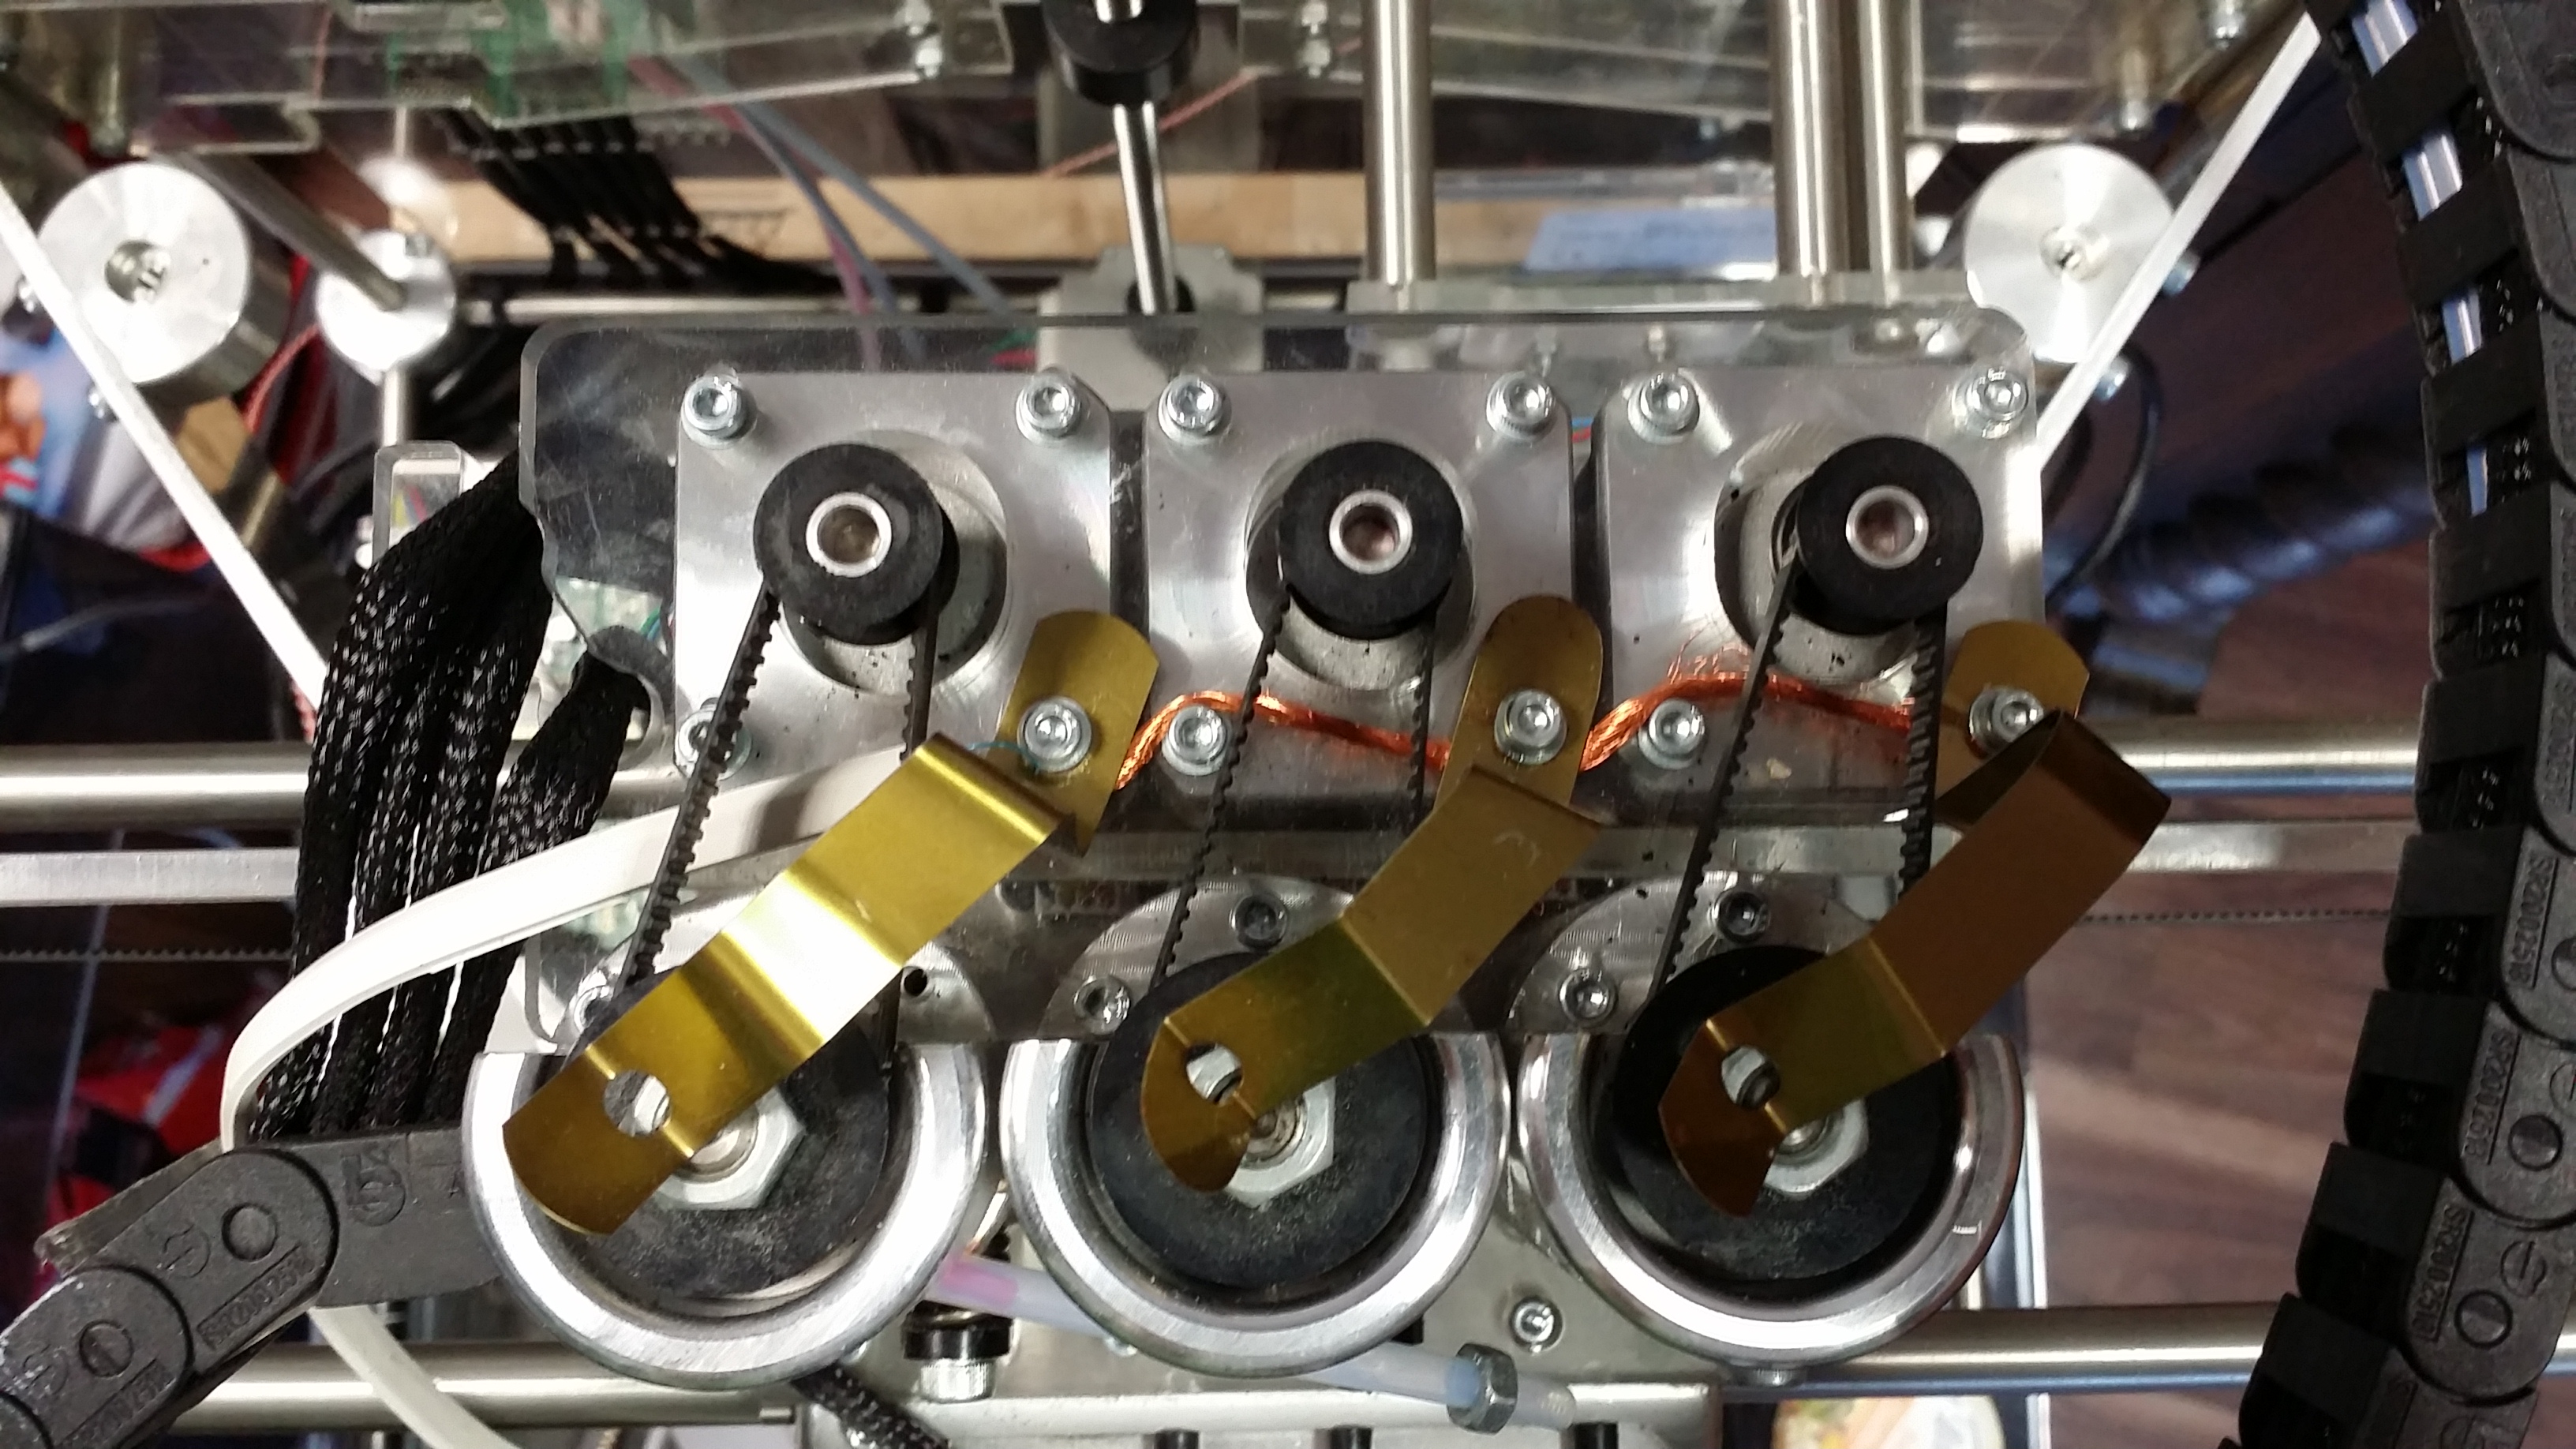
When I first used the machine it was extremely unreliable. Pretty much every model was ruined when the the machine reset itself 30 to 40 minutes into the build. Something was causing the CPU to reset randomly. The problem seemed to be caused by the revolving thread in the extruder, rubbing against the ABS and causing static electricity, which would eventually unload via the stepper wiring into the CPU.
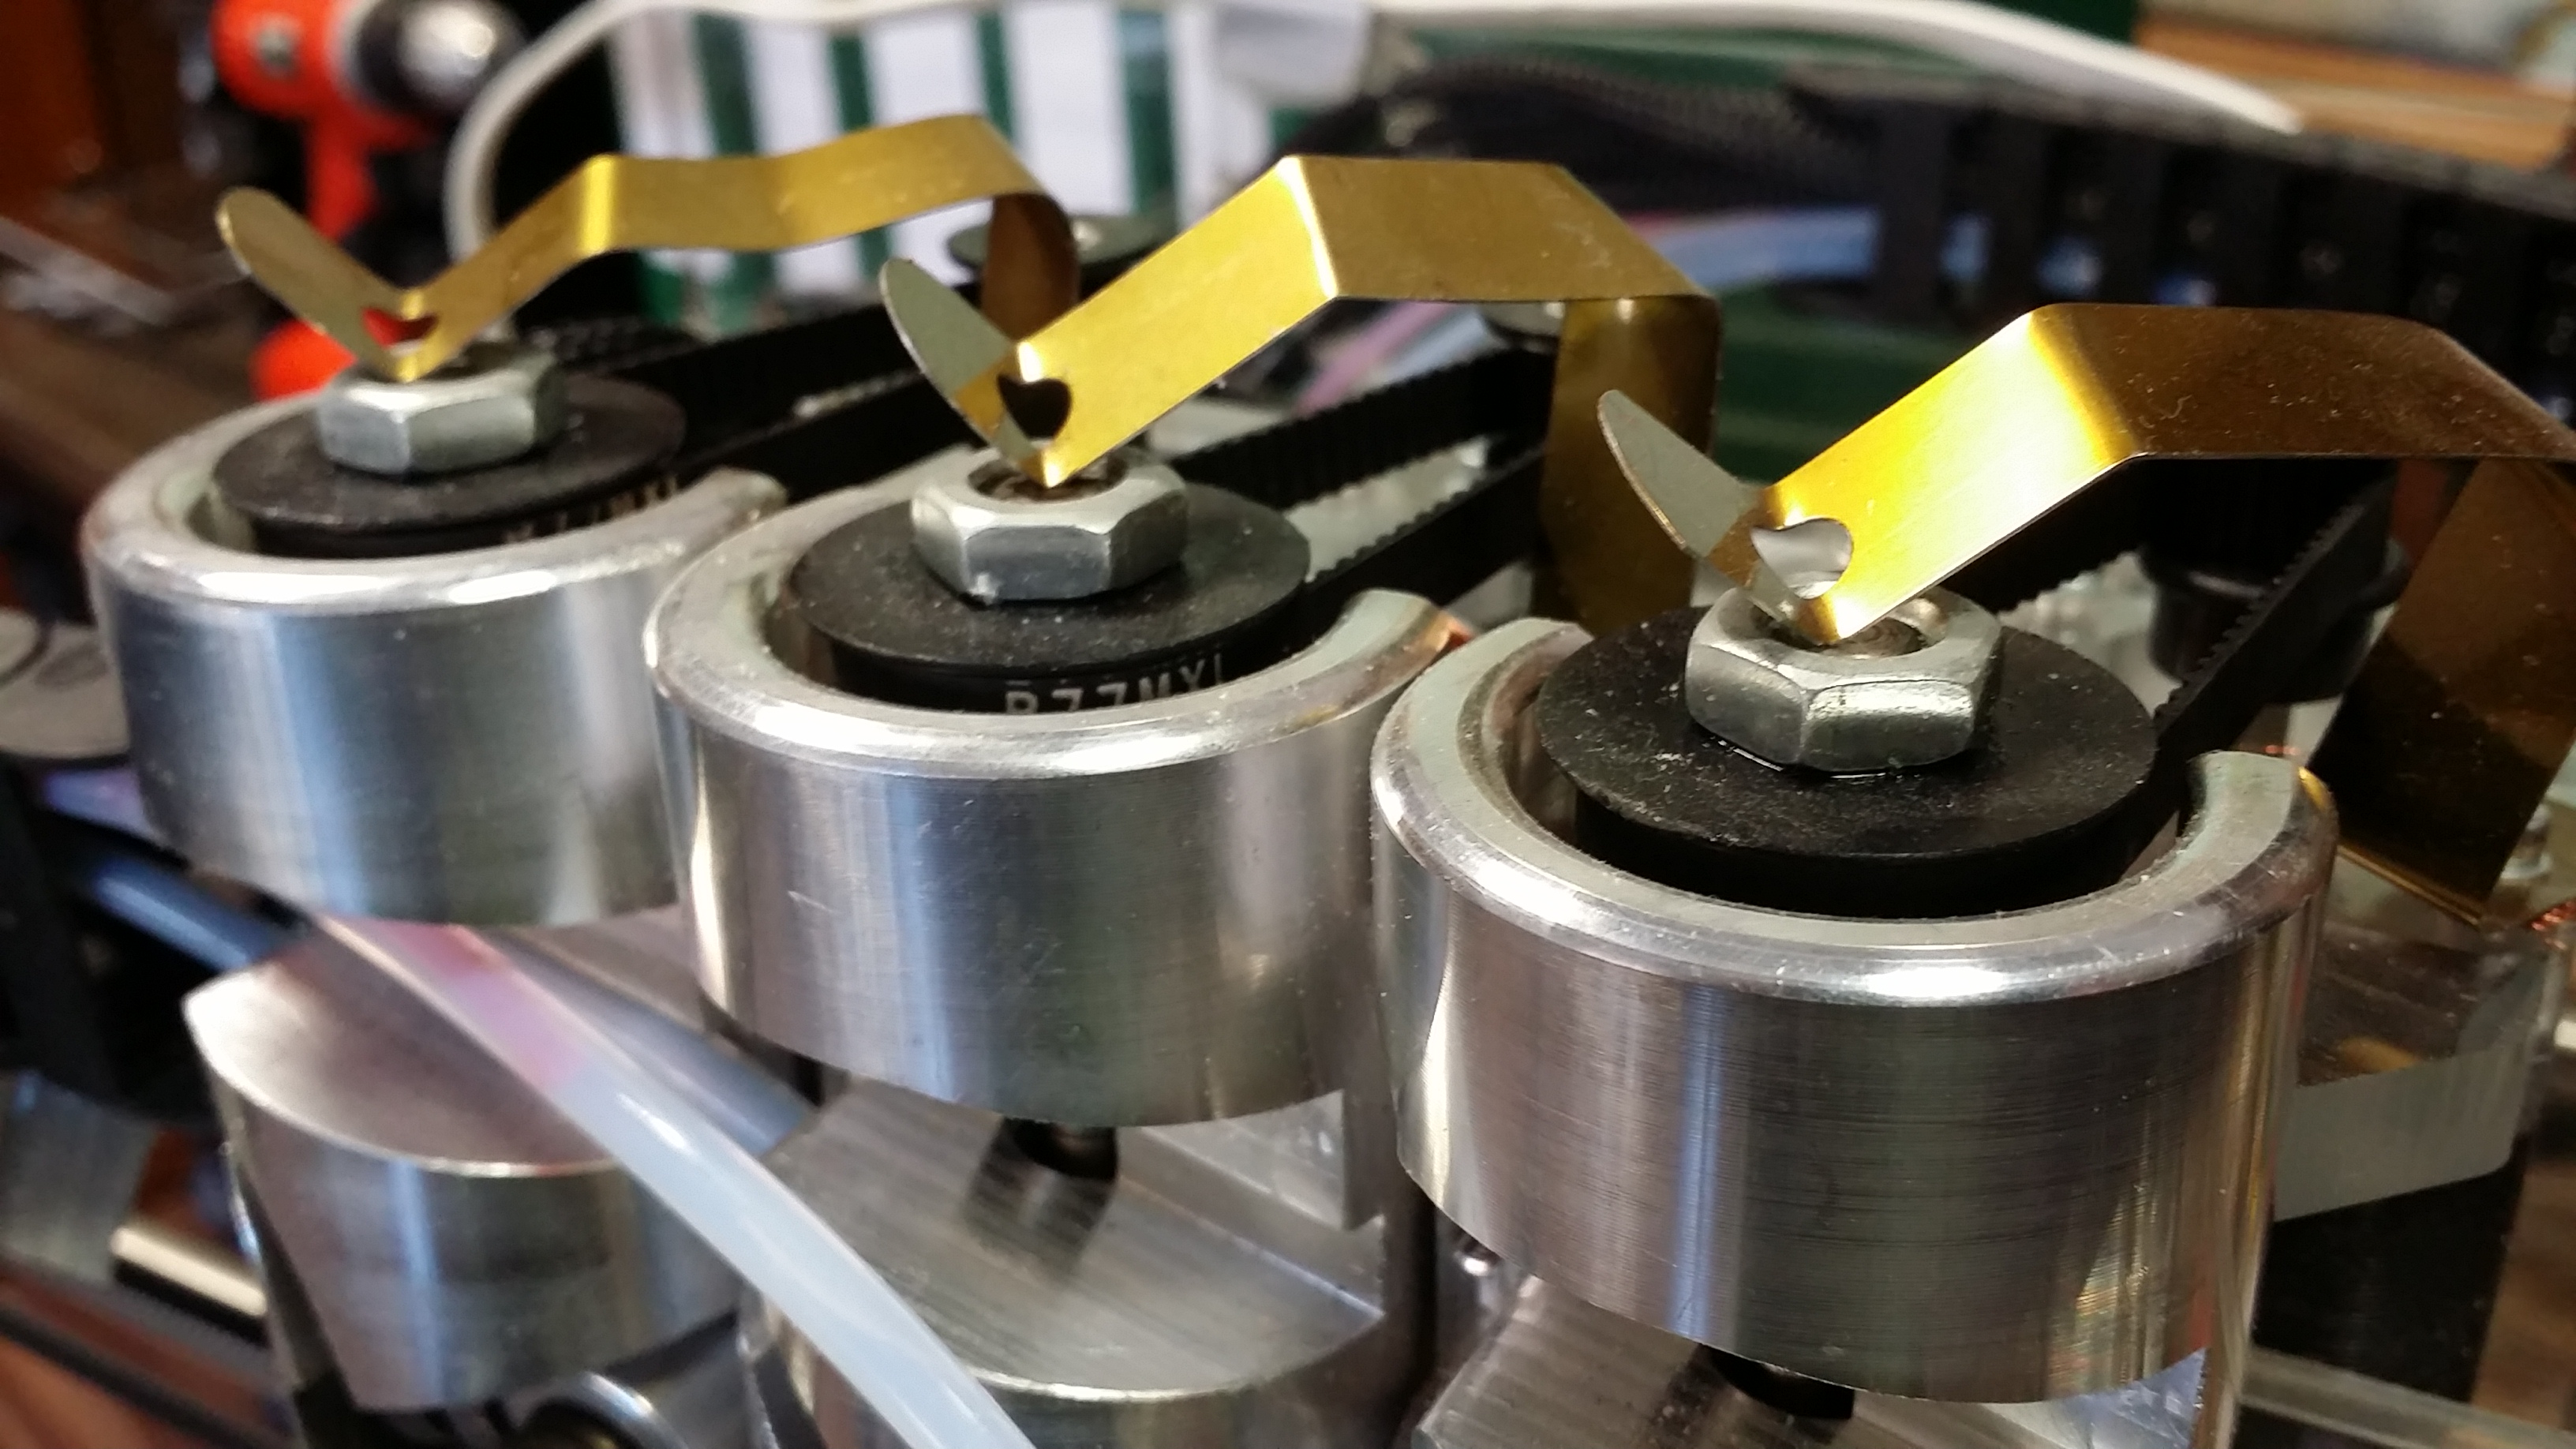
I added a metallic grounded tab that touches the extruder axle and routes all electricity to the chassis, reliably avoiding any shocks to the electronics board.
Problem 6: protruding USB sticks
This design oversight ruined a trade show that I was trying to do. The USB plug is positioned all the way at the front of the machine. Any USB stick protrudes from the chassis and can easily be ripped out. Well, I made it worse and hit the stick with my knee, destroying the USB plug and bending the USB stick.
The easy solution is to use tiny USB sticks. The elegant solution would be a rerouting of the plug into a protected position. The crude solution is a metal bar that keeps operators from hitting the stick. BTW: the USB plug is a standard part and was easily replaced and resolderd.
Problem 7: snapping filament
This is a major issue. PLA filament dries out quickly and tends to snap easily deep inside the flexpipes that are routed through the machine. The rounting changes direction multiple times, generating a torsion load that makes snapping even more likely.
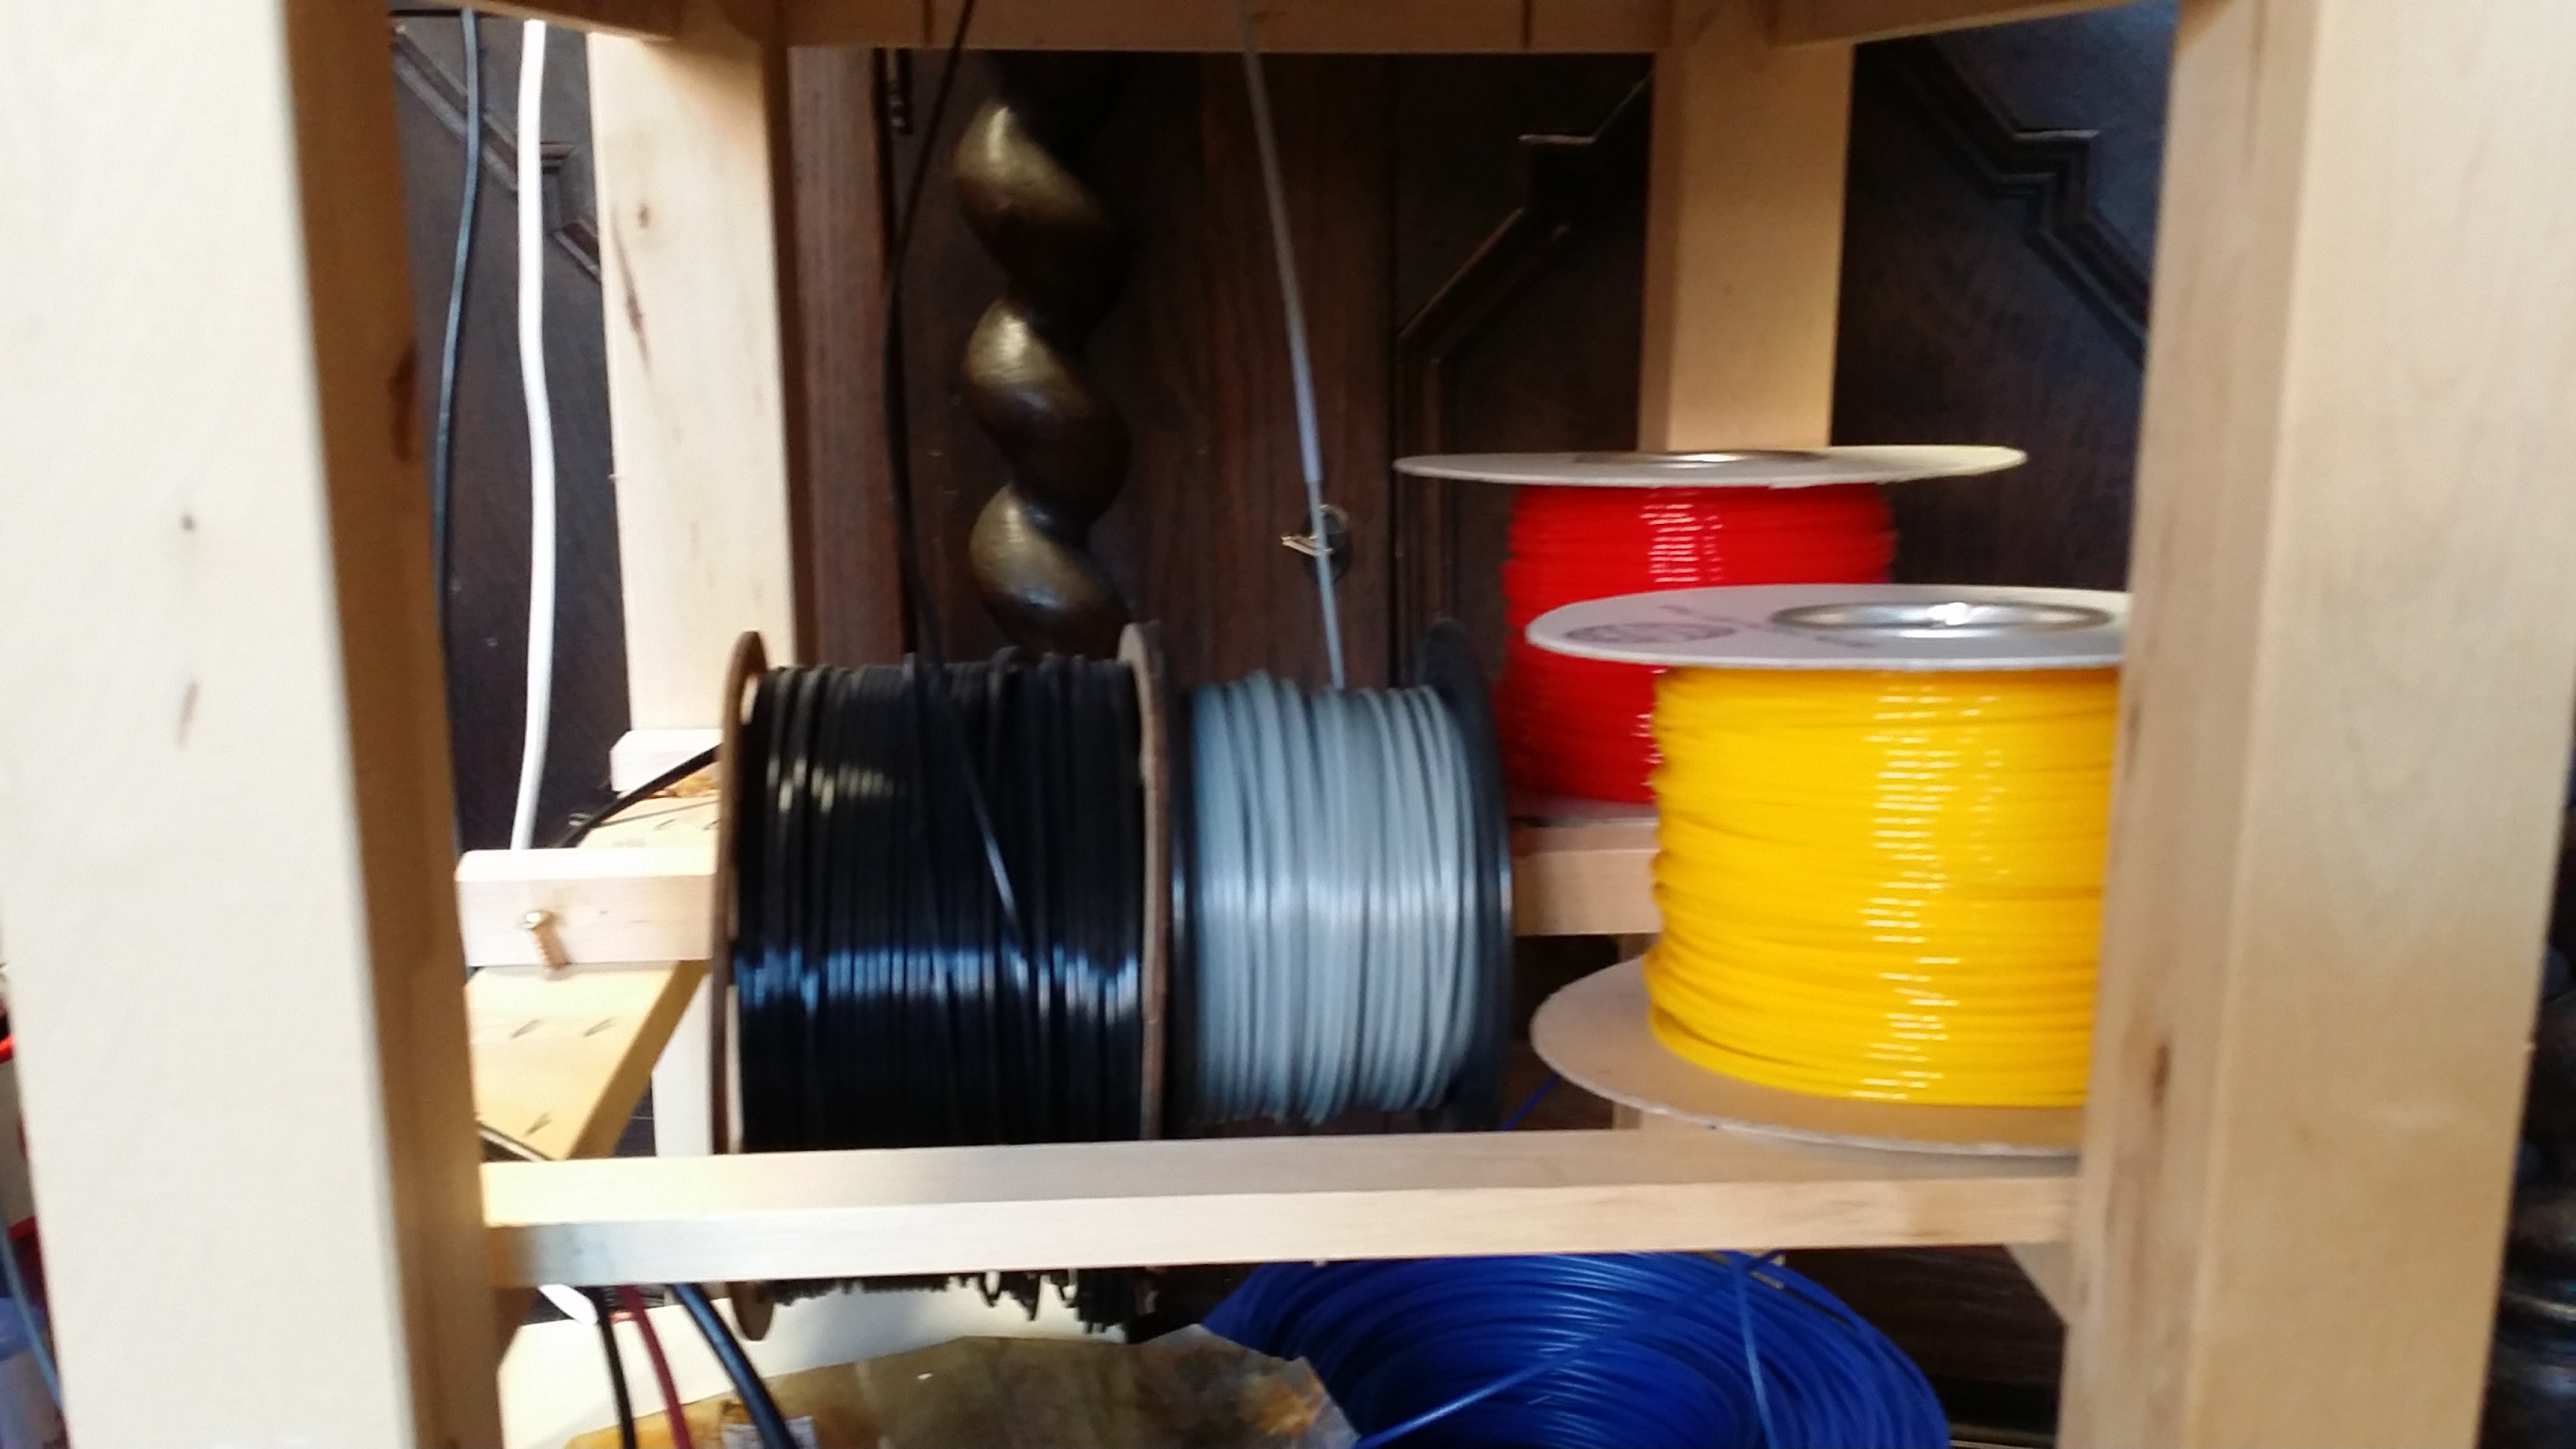
I ended up buying the Ikea BEKVÄM cart which hold the BFB Touch prefectly. Instead of fitting tiny spools of filament into the body of the machine, I now use larger spools and rounte the flexpipes through the table top, reducing the amount of bending and torsion, reducing the risk of breaking.
I also tried various sprays to make it easier for the filament to glide through the flexpipe. Not sure if that improved anything.
Problem 7.1: drying filament
Since I have now much more space for the spools, I plan to lasercut air-tight spool cartridges and equip them with humidity-collecting gel. This should help the filament stay dry, not sucking humidity from the air, and reducing the tendency to snap.
Problem 7.2: snapped filament ruins build

Now we can not completely eliminate the risk of filament breaking. If that happens toward the end of a build, the whole model is ruined and a lot of time is wasted. It would be nice to mount switches on the extruders that sense the missing filament and trigger a build pause and an operator alert.
Problem 8: multiple extruders don’t stay heated
This design shortcut in the original BFB Touch makes printing with multiple heads a huge pain. The power supply in the machine is so weak that it can never heat more than a single extruder. It can’t even keep a second extruder at temperature while heating another one. So when printing with multiple materials, every material change causes a two minute break until the next extruder is brought back to heat. That way, a 5cm high object from two materials wastes 400 minutes alone for re-heating extruders.
I have already replaced the power supply with a much more powerful one, but unfortunately, BFB has disabled heating multiple extruders at once in their firmware. This leaves me with three options: reverse engineer the firmware, add external electronics to heat the head, or replace the entire controller with an OpenSource system.
Problem 9: Axon 2 / Firmware
The software that comes with the machine is quite minimal. Between Axon 1 and Axon 2, 3DS actually removed very important setting from the software. The 3 extruders on the machine are still not supported, They also went from simple GCode, that could be edited manually when there was a build issue, to a proprietary encrypted format. I am now sufficiently anoyed that I will not install any new firmware as 3DS may go completely proprietery, making the machine effectively useless. Luckily there are other 3d slicers out there that work quite well with the BFB Touch.
I like to use Kissslicer, even though it can be quirky at times. I really would like to avoid writing my own slicer.
Problems 10 to 13
Yes, there is more. The BFB Touch was one of the first semi professional machines for a pretty low price, so a bunch of kinks were to be expected. I wonder if the CubeX and CuboPro have evolved enough to fix most issues.
- the wiper and extrusion container are not adequate. I am not the first one to find that out as there are at least three different custom wipers for the BFB Touch on Thingyverse.
- the firmware checks the entire BFB file for correctness which is great. I do not understand why the developers didn’t use this occasion to estimate the build time at this point.
- the menu item that is supposed to help me to level the build platform drives the head into four positions. As the build plate has three leveling bolts, the head positions correspond in no way to the leveling bolts, making leveling much more tedious than it needs to be
- I wish the nozzles were easily replaceable with nozzles with a smalle diameter if needed.
Problem 14: Burnout
Great. After all the improvements I described above, after exactly two years, the BFB motherboard failed on me. Filing a report with BFB is of no use as the company was bought by 3DS, who seem to be much more interested in selling new printers, than repairing their old ones.
No reply to my ticket in two weeks. I guess if you want a 3D printer with zero support after two years, 3D Systems is your company.
For some inexplicable reason, I feel like I need to get the machine running (I don’t say “running again”, because it never finished a decent 3D printout in its entire machine life yet). Pretty much everything has been redesigned or replaced by me by now. The original parts are a few steel rods and the motors.
So I ordered a Rumba controller which will take care of all the remaining software issues described above. I added the graphics display and a much better power supply. Now even the heated bed can be controlled via software, making the expesive thermostat controller obsolete – ah well.
I will add my experiences with Rumba in the BFB Touch as I continue the rebuild.
For now, the 3D Touch has been a thorough disappointment. My original cupcake, slapped together from cardboard and plywood, costing less than a fifth, was more reliable, faster, and had a better support. Sad, sad, sad.
The Rumba Controller
As described on the previous page, my BFB controller is now mostly dead. A first analysis by someone who should know (“Just exchange the hot end. With BFB Touch it is always the thermistor that is burnt out.”) was plain wrong. So what I needed was a new controller (BFB never reacted to my request for a replacement).
The new controller had to be fast, support three extruders, had to be OpenSource, and easy to maintain. As of early 2014 that left me with the Duet 3D plus Expansion Board, the Elefu RA 3D, the Megatronics 3.0, or the Rumba.
The Duet is simply too expensive. Sure, having the ARM CPU and the Ethernet connection is nice, but it was not clear which software would compile and run with it. The RA 3D seemed ok. The Megatronics had no documentation about the LCD controller – I still don’t know if I can conect one.
So the choice came down to the Rumba as it was easily available (two days from order to delivery) with 7 Polulos (the Y axis has two steppers; I will piggyback two controllers for this axis), an ATMega that runs the Marlin software, and a nice power supply.
Delivery
All the parts were delivered today. The Rumba comes pre-programmed, so I was able to hook it to my Mac and connect via Pronterface. Yay! The Arduino IDE also found the controller, so there is a good chance that I can reflash a new firmware as soon as I have that compiled.
Looking good so far. I hope I can get something to move this week.
Firmware
I am using Marlin as the firmware for the Rumba. Against all my expectations and experiences, downloading and compiling the firmaware went almost flawlessliy. I managed to change settings for my full graphics display, recompiled, and uploaded the firmware using the Arduino IDE on my Mac and a USB cable.
There is one flaw though: I can set one or two extruders in the configuration, but activating the tird extruder makes the compile fail. I will find the details later. For now, I want to get the machine going.
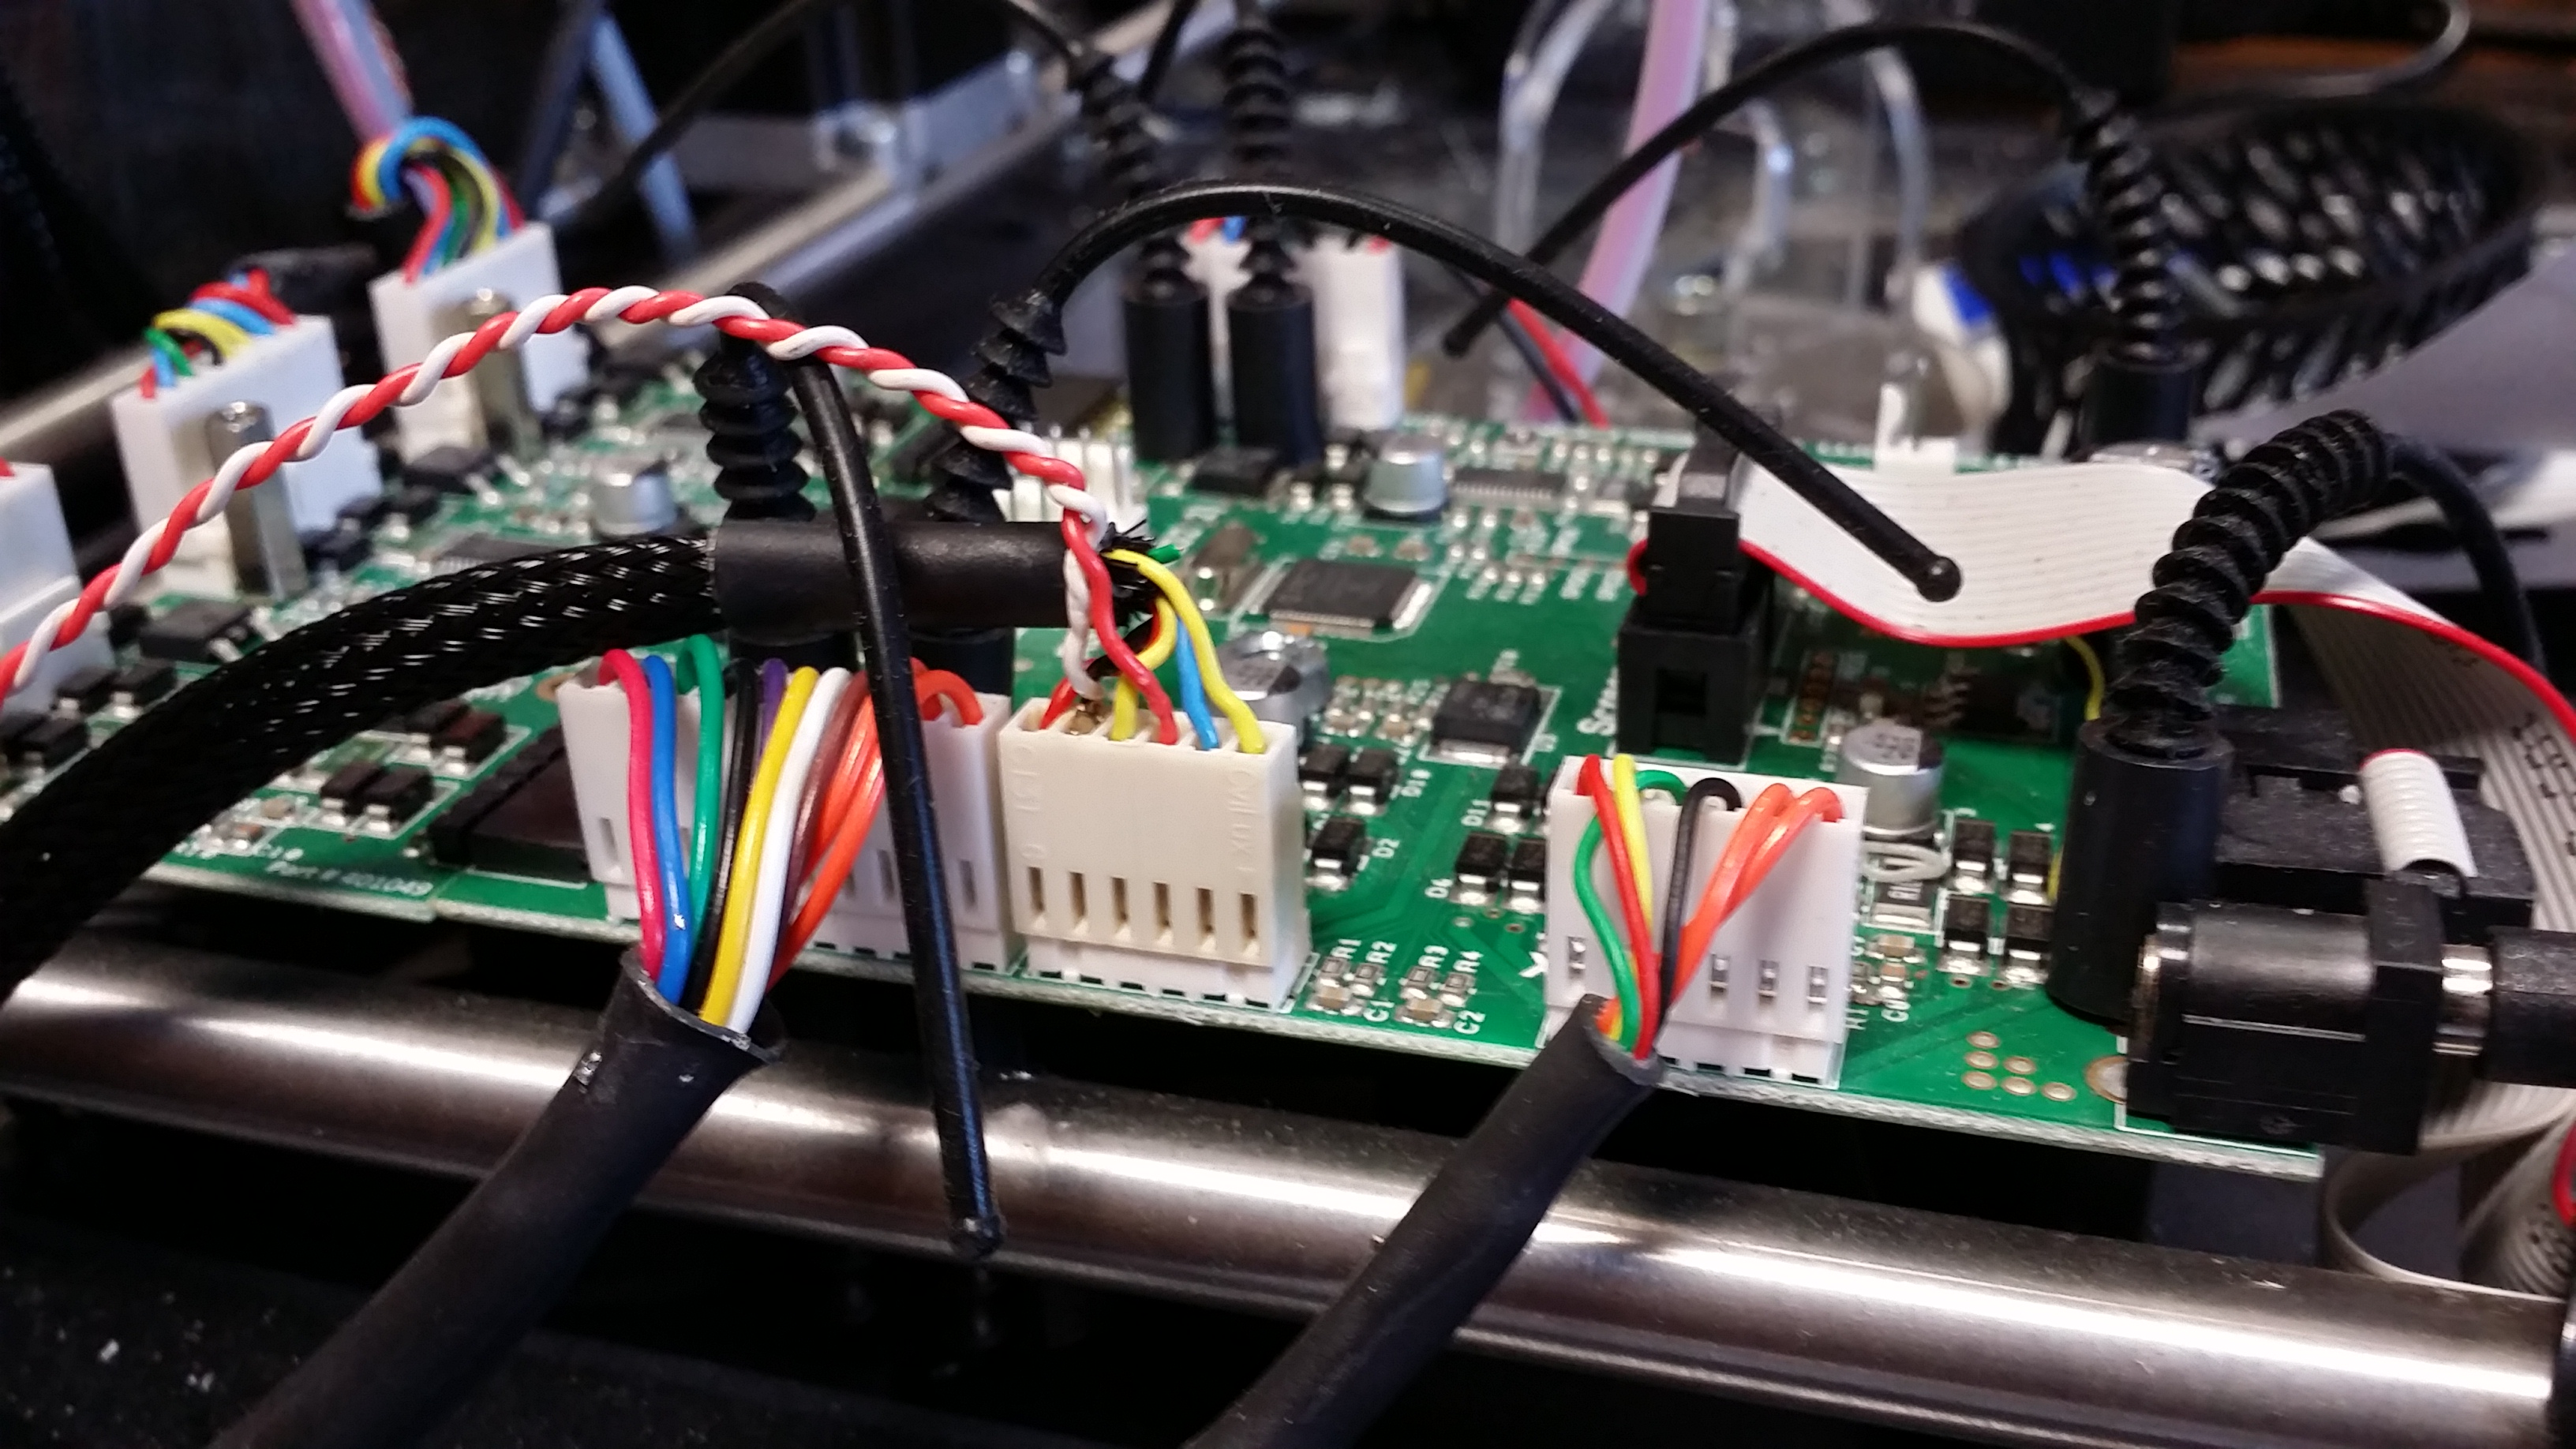
Wiring Harness
Today I followed, measured, traced, and spied on all the lines that go from the 3D Touch circuit board into the machine. Pretty much everything maps onto the Rumba controller, using a somewhat complex wiring harness. Soldering should keep me busy for two hours or so, hopefully tomorrow.
- the thermistor is 200k, but which one? I would like to get the curve right. (4338K beta value? 204GT-1? ATC Semitec?)
- x, y, z, steps: 87.6195,87.4891,200*8/3,1000 ?
- calibration
- nozzle diameter is 0.5mm
- build size (3 nozzles) 185x275x210mm
The Solution!
You read the blog?
If you have read the previous pages, you now know that I had a lot of bad luck with my 3DSystems BFB Touch. Actually, it’s more a faulty design combined with terrible customer support – nothing to do with luck
Customer support? Which customer support?
I made two more attempts to get the mother board on my 3DSystems BFB Touch changed. It broke just two days after the warranty ran out, and I was even prepared to pay for the board, but 3DSystems simply stopped answering my mails.
3DSystems…
3DSystems has probably grown much too fast. They have bought companies left and right and probaby fired half of the staff or made them leave. The effect for me as a customer is, that a machine that is merely two years old and has cost three grand is now unrepairable.
What happened to all those who bouht a ZPrinter for 85.000 Euros two years ago? Do they have the same issue? Or are they forced to sign maintenance contracts?
My conclusion is, that I will not buy from 3D Systems again. Ever.
But here is the promised solution
After fiddling with Rumba and all the other issues, spending roughly 600 Euros on hardware, I got quite fed up. The machine is back to something that resembles 3D printing, but it has cost me hours and hours of experimenting and cursing. And it is still not nearly perfect.
Four days ago, I ordered the Da Vinci 1.0 from XYZPrinting for less than half the money than I spent on BFB repairs alone. And guess what: the machines produces better quality prints as a plug-and-play machine than the “semi-professional” BFB ever did!
Am I going to buy a 3D Systems Cube? Or any other 3D Systems machine?